Oftentimes when creating a VM we are left with a great deal of extra/wasted space and a bloated .ova file upon export. We can use the GParted tool (http://downloads.sourceforge.net/gparted/gparted-live-0.26.1-5-i686.iso) to clone the hard disk, effectively shrinking the size considerably.
Before starting you will want to run the following as root on your VM:
- apt-get clean && apt-get autoremove
- tune2fs -m 2 /dev/sda1 to set reserved blocks (however, as it is a boot2root and you will not be logging in as root you can free up more space with m0, setting no reserved blocks).
Next power down the VM and remove all unecessary snapshots, and run the disk defragment and disk compact from the virtual machine settings menu.
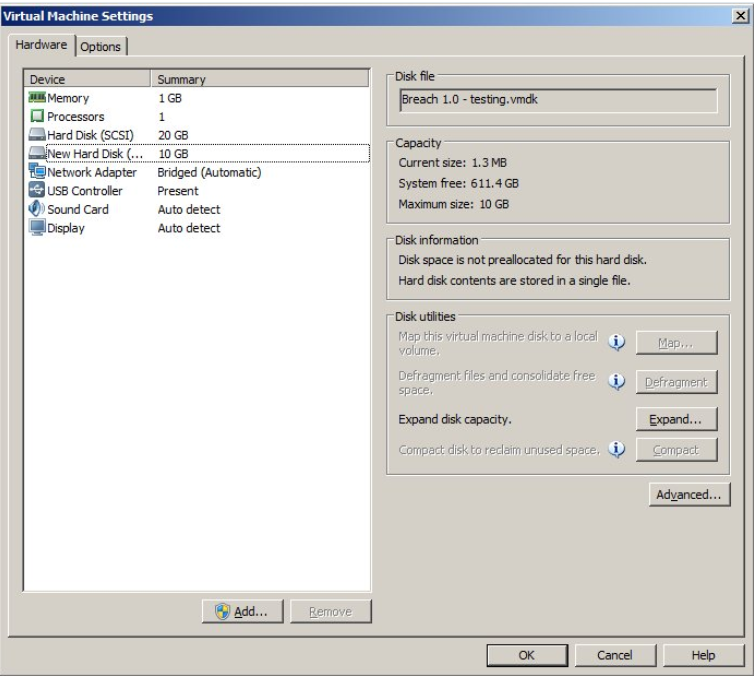
Next we will want to add a second hard drive to the VM (in this case I added a 10GB hard drive because I knew the filesystem of the VM would fit). You will need to make sure you size the second hard drive correctly, keeping in mind an adequate amount of free space. (i.e. if you are creating a boot2root VM challenge that requires bruteforcing you will need to leave at least 300-400 mb of free space as the disk will fill up quickly).
Next you will want to add a CD drive and boot the VM via the GParted live CD ISO. In VMware you will go to power settings –> power on to firmware and then change the boot order with the +/- keys until the cd-rom is on top. Save the changes and boot into GParted. Once it loads your screen will look like this: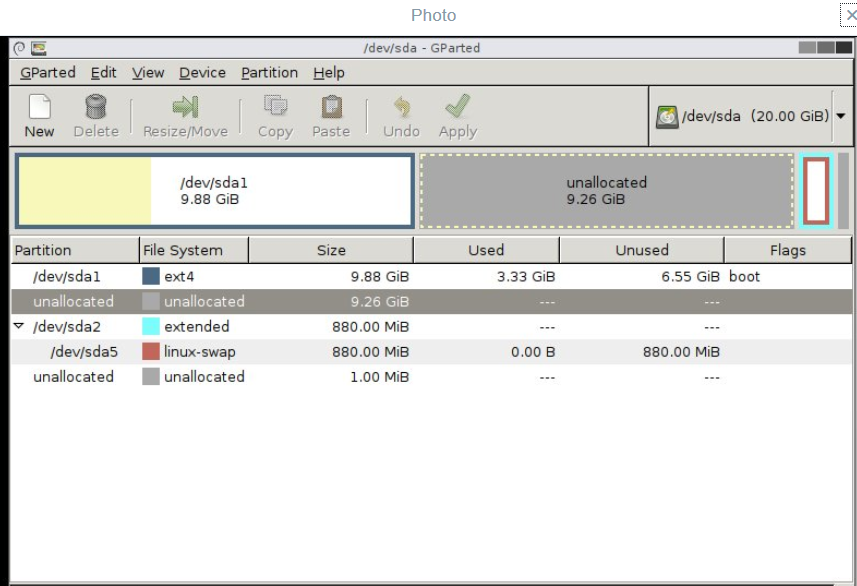
Once in GParted, click on the drop down on the right hand side and select SDB. Once you are in the SDB view click on ‘Device —> create partition table –> MSDOS. Go back to the SDA view, right click on SDA 1 and shrink it down to an appropriate size, leaving enough space for any future changes. Once the SDA is resized, right click on SDA, select ‘copy’, click back to the SDB screen, click in the grey space which says ‘unallocated’ and click paste.
Next, click back to the SDA view and check the size of SDA5.
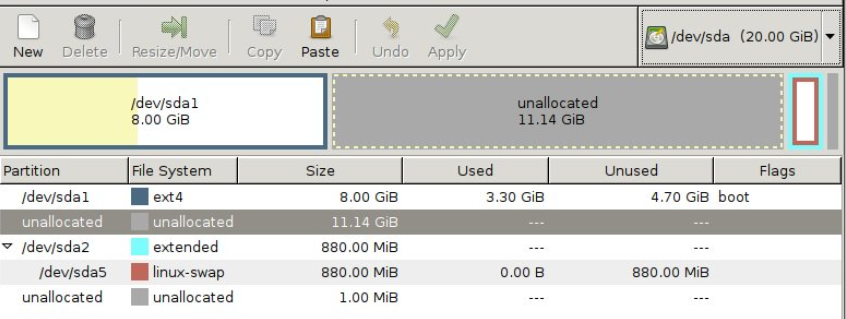
Click back to SDB, right click on the unallocated space and choose –> new –> type extended. You will want the extended partition to be at least the size of the /dev/sda5 from the SDA view for your swap space.
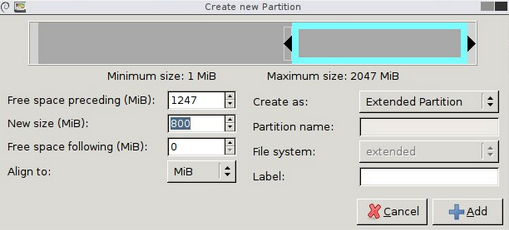
Next, click back to the SDA view, right click on SDA5 and choose copy then click back to the SDB and select paste inside the blue box which is your extended partition. Once complete, the SDB view will look like this:
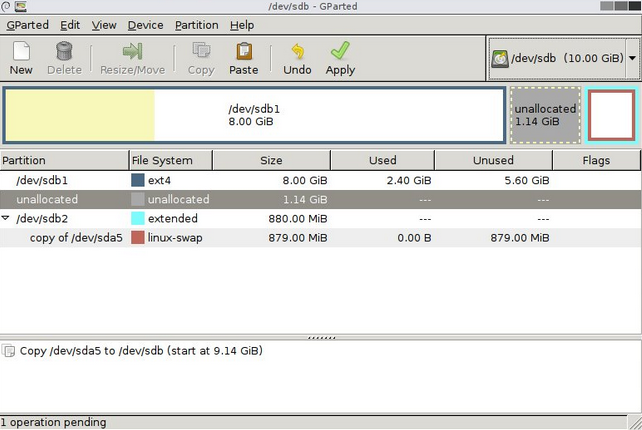
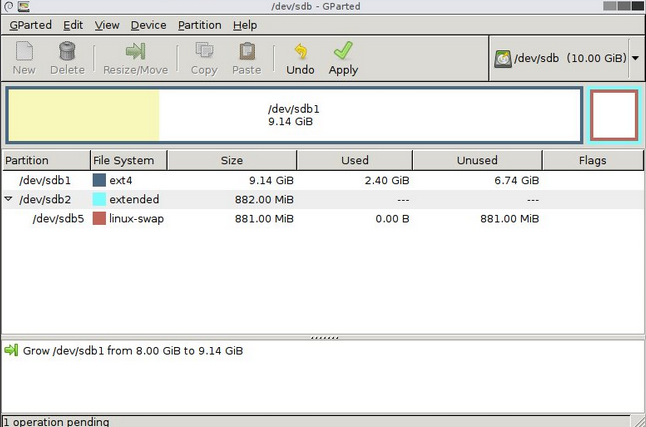
Before moving on, right click on SDB1, choose ‘resize’ and then drag the line into place and click ‘apply’. Your disk is now re-sized and the VMDK is shrunk down and should look like this:
Exit the GParted window, open a console window and type ‘sudo poweroff’ (you may have to type sudo su first).
Next, delete the first, large disk under the VM settings menu and then click on the new disk, select advanced options and set the disk to SCSI0:0
Next we have to re-install the GRUB boot loader. Change the CD to boot from the installer ISO (whichever ISO you used to installed the OS, either Ubuntu or Debian). Use the same power settings as before and boot the VM via this iso. Once the VM boots select “rescue mode” or “rescue a broken system” from the main menu.
The configuration will start again, choose ‘no’ for configure the network.
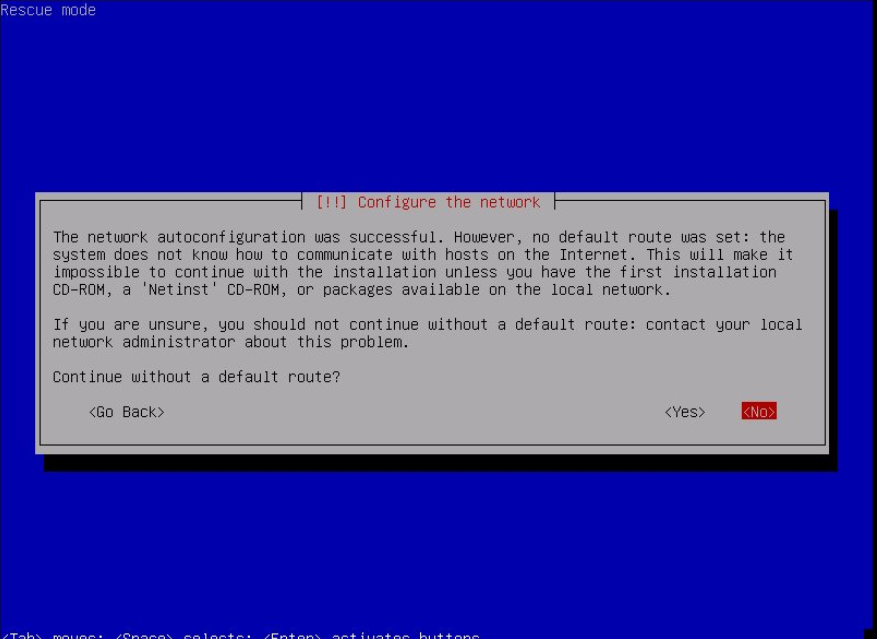
Move through the menus as normal and once prompted select /dev/sda1 on the following screen:
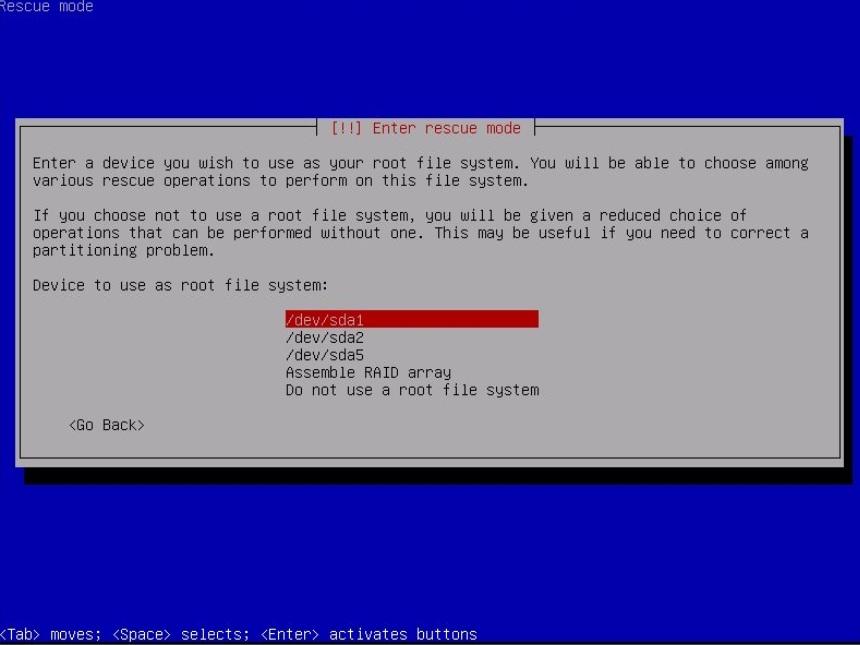
On the next screen choose ‘reinstall GRUB boot loader.
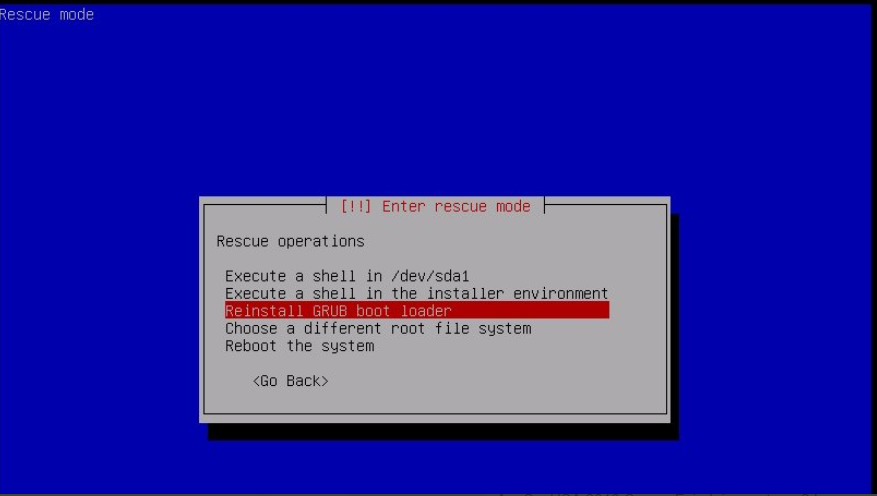
When prompted type in ‘/dev/sda’ and hit enter. Once complete, you will be thrown back to the above screen. Choose “execute a shell in the installer environment”.
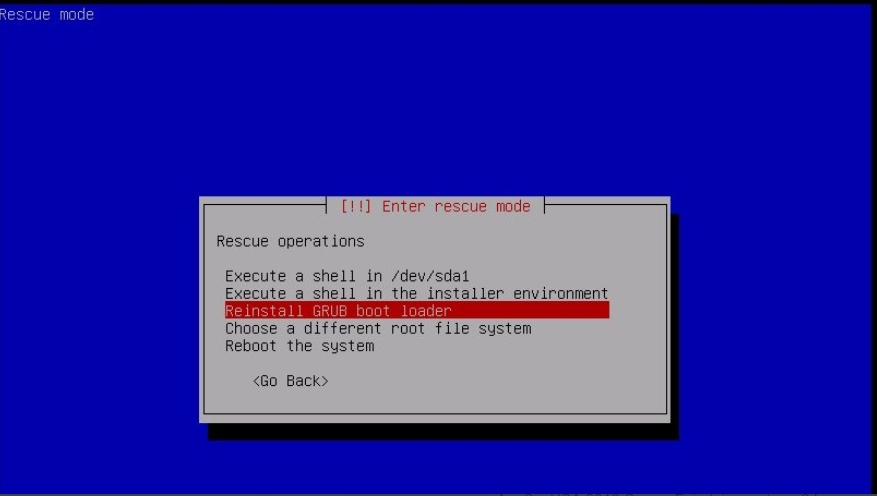
When the shell prompt opens type “poweroff”.
Re-export the .ova file and it should be considerably smaller.
